• Make
  • Cook
  • Read
  • Think
  • My Story

created for joy

~ make today

created for joy

Monthly Archives: December 2011

Beachscapes

31 Saturday Dec 2011

Posted by createdforjoy in Make, Read

≈ 2 Comments

Tags

beach, craft, make, plants, read, reindeer moss, sand, shells, succulents, terrarium

terrarium8

I find most people naturally gravitate toward a certain type of landscape. For some, the mountains are the only real destination, and nothing excites or calms them like hiking and camping in the midst of thick forest, on the edge of cold lakewater. There are those who thrill in wide open, wavy-hot, golden plains, the kind of land where the views go on for miles, uninterrupted and clear.

My own heart’s cry is unmistakable: I love the beach. There is that moment every time when I first see palm trees and smell the salt on the breeze, and I just know I am home. This fall we visited the beach for the first time in years; the first time since my world changed because of unexpected, lasting illness; and only a few short months after I almost lost my life this summer. (Typing that makes me uncomfortable, but I am resisting the urge to tone it down because it is also true. If I don’t acknowledge yesterday’s pain, I think I lose some of today’s victory.) Going back to the beach was a homecoming of the sweetest sort, one of those precious times when you recognize every moment for the gift it is and can enjoy every part of it, from sunburn to sandy toes. I smiled for days, until my cheeks hurt and I had a tan that matched the laugh lines on my face.

terrarium1

I brought back plenty of shells and a bag full of sand from the beach, and I determined to build a miniature beachscape to live on my dining room table. The ever-faithful T.J. Maxx offered a host of inexpensive choices for clear glass containers, and our local home and garden store stocked a few succulents that are also native to the San Diego beach we visited. The rest was highly therapeutic sorting, pouring, planting, and arranging.

terrarium6

I love to try new things; that occasionally gets me into trouble, and it quite often gets me elbow-deep in glue, paint, potting soil, or cake batter. (never simultaneously thankfully :) This time it got sand in my teeth and bits of seashells under my nails, but it was delightful. As soon as I finished my little bowl of beach zen, I was ready to make another one.

terrarium3

I made a second run for plants and glassware, and constructed two more terrariums for close friends, plus a small one for my husband to take to work — a little bit of permanent vacation in the midst of fluorescent lights and upholstered cubicle walls. You don’t need a particularly green thumb to make or keep a beach terrarium with succulents. A splash of water every week or two is all these require.

terrarium4

After I finished my inaugural efforts, I went in search of a book to learn more. I knew I’d found like minds as soon as I opened Terrarium Craft: Create 50 Magical, Miniature Worlds by Amy Bryant Aiello and Kate Bryant. The title pages picture a terrarium almost exactly like the first I made, complete with sand, shells, reindeer moss, and succulents. The book is a fantastic resource with all the basic how-to’s and ideas for dozens of containers, plants, and decorative additions.

terrarium2

I love how easy terrariums are to personalize — beaches or mountains; lush and flowering or spare and clean; elegant table centerpiece or quirky office decoration. Terrariums are also a great way to house keepsakes from your latest vacation, a reminder of that dream trip you haven’t taken yet, or your favorite pieces of home. And you don’t need any special gardening or crafting skills to put one together, just a willingness to get your hands a little dirty. Feel free to post your questions, and let me know how yours turns out. :)

Photobucket

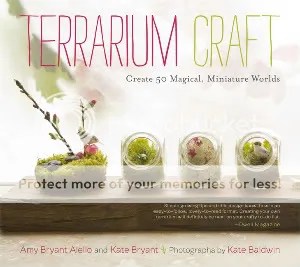
(Timber Press: 2011; ISBN 978-1604692341)

Advertisement

Clockwork Cthulhu

27 Tuesday Dec 2011

Posted by createdforjoy in Make, Read

≈ 2 Comments

Tags

art, cthulhu, gears, glow in the dark, H.P. Lovecraft, Jules Verne, make, pocketwatch, polymer clay, read, steampunk, vintage

cthuluhumain

I made all the holiday gifts I gave to grown-ups this year, and these three polymer clay miniatures were without doubt the most fun to construct. I made one each for my husband and two close friends, all of whom like Steampunk and the work of H.P. Lovecraft. For those of you not on that particular bandwagon, be warned: you may feel yourself growing geekier as I explain. ;)

Lovecraft was a prolific horror fiction author from New England who lived in the late 1890s and early 1900s. Cthulhu is one of his monsters of the deep, a sort of winged cephalopod with a few human cousins somewhere on the family tree. Cthulhu is one of Lovecraft’s most beloved creations and has gone on to inspire a whole range of modern fiction and film. (I personally attribute his popularity to those charming tentacles.) Of course little did Lovecraft know, he wasn’t even scratching the surface — have you seen the stuff that actually lives in the deepest parts of the ocean? (Don’t get me started on that episode of Blue Planet with the anglerfish…)

cthuluhu1

On to our second geeky definition: Steampunk is a science fiction sub-genre based on a sort of anachronistic alternate future, modeled after Victorian England’s technology. Just picture our society as a Victorian might have imagined it — steam-powered, clockwork-driven, and founded on the principle that everyone wears hats and gloves at all times. Jules Verne wearing goggles + metal gears + computers = Steampunk.

cthuluhu4

I love working with vintage materials and I appreciate a vivid literary imagination, so these projects were a good fit. I decided to blend the two genres and create captured, clockwork Cthulhus, so I emptied out my jar of pocketwatch parts, grabbed a pack of glow-in-the-dark Fimo, and got to work. I really enjoyed crafting the tiny clay miniatures, brushing them with mica powder, and posing them in their new habitats.

cthuluhu7

I am such a sucker for anything luminescent, and I spent as much time sitting in the dark watching these glow as I did actually sculpting. :) The smallest Chtulhu is about an inch high and spends his life inside a pocketwatch case. The other two measure about 2″ and 4″ across and make their homes in vintage mainspring advertising tins. I used tiny old screws, cogs, and rivets to add a little extra Steampunk flair.

cthuluhu3

While studio time is often both cathartic and challenging for me, the hours spent on these were just plain old, inventive fun. They were also a great exercise in using what I already had on hand to create what I had in mind. I vow not to stop here, and there are definitely more tiny clay creatures in my future. I’m thinking a tiny jar of miniature, glow-in-the-dark, mechanical fireflies…

cthuluhu2

If you’re interested in making your own Steampunk creations, you might check out Steampunkery: Polymer Clay and Mixed Media Projects by Christi Friesen. Her design sense is a bit different from mine but wholly inspiring nonetheless, and she has a fantastic sense of humor. It’s a great starting point, especially if you’re new to the world of polymer clay. Happy Steampunking!

cthuluhu5

Chocolate-Orange Pound Cake

26 Monday Dec 2011

Posted by createdforjoy in Cook

≈ Leave a comment

Tags

chocolate, holiday baking, mini-chocolate chips, moist, orange, orange juice powder, orange oil, pound cake, Terry's Chocolate Orange

poundcake1

Have you ever had a Terry’s Chocolate Orange? It is an orange-flavored chocolate sphere, wrapped in printed foil so it looks like a piece of fruit. Before eating, you thwack it hard against the table so it splits into twenty neat little segments. When I lived in England growing up, it was a Christmas tradition, and for me, December + nostalgia = inventive baking. :)

Enter Chocolate-Orange Pound Cake. It is bright and moist, orange-scented and chock full of mini-chocolate chips. It has a dense, tender crumb and a hint of tart citrus tang in the glaze. Pound cakes are not the simplest to make, but they are worth the effort. This just sings of holidays and making memories for me.

poundcake2

Chocolate-Orange Pound Cake
makes one Bundt-style cake, two large loaves, or four small loaves

For cake:
1 c. unsalted butter, softened (2 sticks, 8 oz.)
2 1/2 c. granulated sugar
1 tsp. vanilla bean paste or real vanilla extract
3 tsp. orange oil (see Recipe Notes)
1/2 tsp. baking powder
1/2 tsp. baking soda
1 tsp. salt (not coarse)
5 large eggs
3 Tbsp. espresso powder or instant coffee powder
1/4 c. warm water
1/4 c. milk
1/2 c. creme fraiche or whole-fat sour cream
1 c. unsweetened cocoa powder (preferably Dutch-process)
2 c. all-purpose flour (I prefer King Arthur)
1 c. semi-sweet mini-chocolate chips, plus more for topping glazed cakes (I use Ghiradelli)

For glaze:
1 c. sifted powdered sugar
1/4 c. orange juice powder (see Recipe Notes, can substitute zest of one orange and use freshly squeezed orange juice in place of water)
3 Tbsp. water
1/4 tsp. orange oil

Oven 325F. Cream the butter and sugar with an electric mixer in a medium mixing bowl for 3 minutes, until lighter in color and fluffy. Add vanilla, orange oil, baking powder, baking soda, and salt, and beat again for 2-3 minutes. Add the eggs one at a time while blending and beat well after each addition. Scrape sides of bowl often with silicon spatula. (Quick tip: it may be tempting to cut short the blending time, but this part is key to a moist, tender pound cake. Your patience will pay off, I promise.)

Dissolve espresso powder in warm water in a small bowl. (Another quick tip: coffee really brings out the best in chocolate; if you don’t have espresso powder, use 1/4 c. dark brewed coffee in place of the warm water.) Whisk in milk and creme fraiche/sour cream. In separate small mixing bowl, whisk or sift together cocoa and flour. Beat this dry ingredient mixture into the batter, alternating in turns with the liquid. Take your time, being sure mixture is thoroughly blended and sides of bowl are scraped after each addition. (Add liquid, blend, scrape; add dry, blend, scrape; repeat… again, totally worth your time.) Your reward will be a homogeneous, fluffy, dense batter, worthy of a tussle over who licks the beaters. Gently stir in the mini-chips with a silicon spatula, being sure to fold in batter from the bottom of bowl to evenly distribute all the little chocolaty morsels.

Pour into well-greased or parchment-lined pans; you have several size options, depending on your needs. This recipe produces 8 cups of batter which can be baked in a 12-cup capacity Bundt-style pan, two 5″x10″ glass loaf pans, or four 4″x7″ small loaf pans. (I used these nifty French Bake-and-Give Wooden Bakers, which come with single-use wooden pans and parchment paper liners; they make for such beautiful gifts.)

Your cooking time will differ based on the container you choose, but approximate times are: one hour, twenty minutes for Bundt; one hour, ten minutes for two large loaves; and one hour even for four small loaves. Watch yours closely and pull them from oven as soon as a tester inserted in the center comes out clean. (Beware the rogue melted chocolate chip which pretends to be raw cake batter; always test twice, just in case. It would be a shame to overcook your cake and waste all that earlier effort.)

Allow cakes to cool 15 minutes in pans on cooling rack, then turn out of pan if desired. (I usually leave cakes in loaf-style pans and just slice in the container before serving.) Allow to cool completely before glazing. To make glaze, whisk ingredients in small mixing bowl until thoroughly blended and smooth. Drizzle over top of cake(s) and then sprinkle liberally with more mini-chocolate chips.

Photobucket

Recipe Notes + Tips:
The key to getting intense orange flavor in this recipe is the use of orange oil. It is cold-pressed from the peel of the fruit, and it takes about 44 oranges to make each ounce of orange oil. I use Boyajian brand citrus oils; see their site for availability near you, but you can always find it on-line at King Arthur Flour or Amazon. It is absolutely worth having in your pantry.

The glaze in this recipe features a second source of orange flavor in the form of orange juice powder, also available from King Arthur Flour. It is essentially all-natural orange juice in solid, concentrated form. I love the flavor punch you get from such a small amount, but unlike orange oil, it’s really not necessary to have it for the recipe to work. As mentioned above, simply substitute the finely chopped zest of one orange and 3 Tbsp. of freshly squeezed orange juice for the orange juice powder and water. However, if you’re an adventurous cook/eater, I’d encourage you to try out orange juice powder, as well as its compatriots, lemon juice and pineapple juice powders. (I’d also love to hear about any recipe inventions they inspire. :)

Leftovers Fairy

24 Saturday Dec 2011

Posted by createdforjoy in Make, Think

≈ 2 Comments

Tags

fairy, leftovers, make, polymer clay, think

leftoversfairy

As I’ve mentioned before, I love a good bout of organizing and order, and in general I am not one to hoard things away just in case. (After all, my name is actually in the phrase “spring cleaning…”) However, all that goes out the window when it comes to art. My family knows I’ve got first dibs on all empty bottles, tins, and interesting cardboard containers, and my studio features lovingly sorted, labelled drawers full of what others might consider trash: out-of-date maps, vintage greeting cards, pages from encyclopedias older than me, and rusty hinges, just to name a few. I respect and value the daily ephemera of the past, and I hate to waste anything that might one day find new life in a piece of art.

Enter the Leftovers Fairy. He’s a charming, slightly odd little fellow made from a blob of polymer clay left over from the Truth Rocks project. His other features are made from bits and bobs lying around the studio after I made a few Clockwork Cthulhus. The Leftovers Fairy is the patron saint of waste not, want not. He loves listening to cover bands and taking long, moonlit walks at the flea market. His favorite foods are wilted chard, bits of chicken stuck to the bottom of the roasting pan, and slightly stale brownies. He believes in the importance of cleaning your plate and saving your recyclables, and some day he would love to settle down with a nice lady fairy made from popsicle sticks, dryer lint, and glitter.

I think I’m in love. :)

Chewy Almond Macaroons

22 Thursday Dec 2011

Posted by createdforjoy in Cook

≈ Leave a comment

Tags

almond paste, almonds, chewy, cookies, gluten-free, holiday baking, macaroons, sweet tooth

macaroonsmainb

Fair warning: only those with a sizable sweet tooth need apply. But somehow these cookies manage to be both decadently sweet and pleasantly light. They look like your average sugar cookie, but then the scent of almond gives away their secret identity. The first bite tells the rest of the story: crispy, crackly edges give way to rich, chewy centers… soon all that’s left is a dusting of powdered sugar on your fingertips and a satisfied smile on your face. And to me, that’s what baking is all about. :)

(I could have easily titled this post Almond Obsession Part 2, since I already indulged myself last week with the Cherry Jam and Almond Cookie Bars. If you’ve seen the light and bought your own case of almond paste, you’re going to love these…)

macaroons1

Chewy Almond Macaroons
makes 36 cookies

21 oz. almond paste (see cookie bar Recipe Notes for more info)
2 c. granulated sugar
3/4 tsp. salt (not coarse)
4 large egg whites, lightly beaten
1 tsp. almond extract
sifted confectioner’s sugar for topping

Oven 325F. Blend the almond paste, sugar, and salt with electric mixer until well-mixed and crumbly. Add egg whites and almond extract and mix again until the dough is a smooth, sticky paste. Using two spoons, scoop the dough by heaped tablespoons on to lightly greased or parchment-lined baking sheets. Leave two inches between each, as cookies will spread quite a bit.

Generously sift powdered sugar over the tops of each little mound of cookie dough. (I love this part — it looks like a little snow-topped mountain range.) Use three fingers to press each cookie a little flatter. Bake for about 20 minutes, until edges are lightly browned and crispy. Remove from oven and allow to cool in the pans, then eat one and transfer the rest to an airtight container. :)

Recipe Notes + Tips:
Many Americans associate macaroons with coconut, but the term macaroon (from the French macaron) refers to any cookie which uses ground nuts and egg white as binding agents instead of flour and whole eggs. Although macaroons include ground nuts or sweetened nut pastes for the body of the cookie, flavors can range from berry to citrus, chocolate to coffee.

Macaroons are super simple to make and are a great gluten-free alternative. This recipe easily halves or doubles, and the cookies can be frozen, well-wrapped, for up to three months. My thanks for recipe inspiration go to King Arthur Flour yet again, this time for their bakery’s Almond Bianchi cookies.

macaroons2

And on this farm, she had a cow…

20 Tuesday Dec 2011

Posted by createdforjoy in Make

≈ Leave a comment

Tags

animals, applique, baby, book, first, make, Martha Stewart, numbers, sew

babybookmain

This time of year is tricky. I am painting and crafting a dozen things I’d like to share with you, but I don’t want to ruin any surprises. I decided this project is pretty safe, as I don’t think my one-year-old nephew is checking the blog very often. :)

babybook5

I made this little cutie from a Martha Stewart craft kit called “My First Numbers Book.” The set came with a 6″-square, pre-assembled fabric book and all the appliques for the numbers and animals. My job was to organize and assemble, both of which I enjoy as a general rule.

babybook4

Like every other Martha project I’ve ever made, this turned out to be a lot more time-consuming and fiddly than the directions implied. I blame the Martha Stewart-patented font. Anything printed in that tiny, tidy little script automatically looks more manageable. “Decoupage intricate tissue paper shapes on to hand-blown eggs? Sure — it’s only three short steps!” These particular three steps turned out to take almost two hours of pain-staking attention to detail.

babybook3

However, also like many other Martha-inspired projects, I really like the results. I am absolutely in love with the brightly-colored animals in this book, and I know my nephew will be too. I can already imagine his enthusiastic cow moos and doggy woofs, and honestly it will be worth all that time and effort just to hear him say the word “bumblebees.” :)

babybook2

Truth Rocks

18 Sunday Dec 2011

Posted by createdforjoy in Make, Think

≈ 1 Comment

Tags

art, Brave Girls Club, daughters, decoupage, glass pebbles, honest, make, mothers, polymer clay, retreat, think, truth

truthrocks1

Art represents both communication and restoration for me. It helps me revel in the joy of every beautiful, blessed breath I take today. It also allows me to explore and share the hardest parts of yesterday, so that I can grieve my losses and discover the goodness that will undoubtedly come from them.

To me, art is also about relationships, about voicing the feelings and truths that might otherwise go unexpressed. I love that both my children are artistically inclined in their own ways, and I treasure the artwork they share with me; every piece is like a little window into how they feel, what they think, and who they are. Kids are complicated, always changing and questioning and becoming, and I value the glimpses of clarity their art provides.

truthrocks2

A few months ago I wandered on to an art site called Brave Girls Club, and the name alone was enough to win me over. It is run by a pair of sisters whose main focus is art classes that give girls and women opportunity for creative fun while encouraging some real soul-searching, honest reflection. When I saw they were hosting a three-week on-line art retreat for mothers and daughters, I knew it was an opportunity I didn’t want to miss. My daughter was equally excited about the prospect of making art and memories together, so we signed up and gathered our supplies.

truthrocks3

Each week there are new projects with how-to videos, detailed directions, and pdf’s to print out. Last week, we made Truth Rocks. Brave Girls Club provided gorgeous little inspirational phrases, which we printed and cut out, then decoupaged on to the backs of large glass pebbles. The last step was to cover each one with polymer clay; I also stamped mine for texture and brushed on metallic mica dust to give them a little shine.

truthrocks4

I love the sentiments the Truth Rocks express, and there is something so special about reading them, about holding a small piece of something real and beautiful in your hand. It has been touching and more than a little revealing to discover how my daughter perceives me, what needs she senses and what strengths she values.

I appreciate this kind of focused quality time with her, and it also gives me a bit of peace to know she is carrying away something concrete to show her how I feel. An 11-year-old girl’s memory might get hazy with time, and I won’t always be around to tell her how greatly she is valued and loved; but I know the art projects we’ve made in the last few weeks will keep on echoing those important truths.

Cherry Jam and Almond Cookie Bars

16 Friday Dec 2011

Posted by createdforjoy in Cook

≈ Leave a comment

Tags

almond paste, almonds, cherry jam, cook, cookie bars, holiday baking, marzipan

cherryalmondbars

I may be slightly more enamored of almonds than the average person. (Doesn’t everyone buy Odense almond paste in bulk?) But you don’t have to be an almond devotee to appreciate these deliciously dense, chewy cookie bars. Cherries and almonds play very well together, and this recipe makes the most of their complimentary flavors. These are nutty and buttery, just the right blend of salty and sweet. I prefer tart cherry jam for the filling, but you can easily substitute raspberry or apricot. Unlike most cookie bars, these are even more moist in the days after baking, and you won’t find a better partner for a hot cup of tea. Case of almond paste, anyone? :)

Cherry Jam and Almond Cookie Bars
makes 32 cookie bars

3/4 c. unsalted butter (1 1/2 sticks)
7 oz. almond paste (about 3/4 c., see Recipe Notes)
1 c. granulated sugar
1 tsp. vanilla bean paste or real vanilla extract
1/2 tsp. almond extract
1 egg
3 c. all-purpose flour (I prefer King Arthur)
1 1/2 tsp. baking powder
1/2 tsp. baking soda
1 tsp. salt (not coarse)
12 oz. sour cherry jam (I use Favorit brand)
1/2 c. sliced almonds
2 Tbsp. coarse sugar (optional)

Oven 375F. Beat softened butter, almond paste, and sugar in electric mixer until well-blended. Add egg and extracts and mix again until thoroughly combined. In separate medium mixing bowl, whisk together flour, baking powder, baking soda, and salt. Stir dry mixture into wet ingredients with rubber spatula until uniformly mixed. Dough will be crumbly.

Reserve 1 1/2 c. dough and use your hands to press the rest into the bottom of a 9″x13″ buttered glass baking dish. Warm jam in microwave one minute and then spread over cookie base. Pat the reserved dough into rounds approximately 1/2″ thick and 3″ across, then place on top of jam. (There will be spaces between the dough rounds where the jam shows through.) Sprinkle top evenly with sliced almonds, then coarse sugar, and bake 26-28 minutes until top is lightly browned. Cool completely before cutting into 32 squares.

Recipe Notes + Tips:
Almond paste is a blend of ground almonds and sugar syrup, usually about 45% almonds. You can make your own, but for this recipe, packaged almond paste is perfectly fine. I find all the large grocery stores in our area stock almond paste in the baking aisle, but you can also buy it on-line. I buy it in bulk on Amazon.com, but dozens of other sites sell it.

Quality almond paste should only include almonds and sugar, never any preservatives or flavorings. One note: marzipan is almost identical to almond paste, but with fewer almonds and more sugar. It will serve in most recipes in place of almond paste, although the results will be sweeter and a tad less moist. (However, in one important way, they are entirely the same: I could happily eat either one by the tube. :)

jammain

It’s a small world

15 Thursday Dec 2011

Posted by createdforjoy in Make, Read

≈ 1 Comment

Tags

craft, felting, make, microcrafts, miniature, pluto, read, roving, solar system, wool

planetsmain1-1

As I’ve mentioned before, I’m a sucker for life in miniature. (It dawns on me that perhaps it’s not coincidence that we own a toy poodle and a chihuahua…) While there is a time and place for chocolate chip cookies that require two hands, I generally gravitate toward the bite-size. And in the studio, I love the challenge of small, intricate artwork. If life is in the details, I’m living well. :)

Photobucket

It should come as no surprise, then, that I was so excited to read Microcrafts: Tiny Treasures to Make and Share by Margaret McGuire and friends. It contains patterns and pictures for 25 little whimsical projects. Among my favorites are matchbox-size felt monster babies, walnut shell sailboats, and mini-fabric bunting just crying out to decorate the top of birthday cupcakes. However, there was no contest for which piece I would try first: as soon as I saw the itty-bitty solar system mobile, I was already reaching for my art supplies.

woolsm3

I recently tried my hand at felting for the first time (the process of making handmade felt from wool roving), so I already had a bin full of hand-dyed alpaca wool waiting to be turned into little planets. The process itself was fairly simple and the only other requirements were soapy, warm water, a bamboo mat (like the type sushi is rolled on), and a little patience.

This turned out to be a great do-together for my daughter and I, as we took turns rolling and shaping the wool into various heavenly bodies. (The only drawback was that our hands smelled like wet alpaca for days. I can now add “smelling like a llama left out in the rain” to my list of Weird Things I’ve Done for Art.) The finished felted spheres range in size from 3/4″ to 1 1/2″ in diameter, and as you can see from the pictures above, they are a fraction of the size of the wool balls with which we began.

planets1

After a day of drying time, assembling the mobile was also pretty straightforward — just a matter of threading embroidery floss through each piece and tying them on. I harvested a couple of twigs from the tree in our front yard to use as the hanging frame (quite possibly the only useful contribution a Bradford pear tree ever made). I already knew my complete lack of scale wouldn’t be winning me any new astrophysicist friends, so I threw in Pluto too. Really, how could I possibly make a miniature solar system model and not include our diminutive neighbor? (Don’t worry Pluto, you’ll never be too small for me.)

(Microcrafts, Quirk Books: 2011, ISBN 978-1594745218)

Vanilla Bean Butterballs with Chocolate Ganache

12 Monday Dec 2011

Posted by createdforjoy in Cook

≈ Leave a comment

Tags

butter, butterballs, chocolate, cook, cookies, ganache, holiday baking, shortbread, vanilla, vanilla sugar

butterballs3

It takes a lot to trump the perfect chocolate chip cookie, but these just might do it. Little nuggets of soft, buttery shortbread sandwiched around creamy chocolate, covered in the warm, sweet crunch of vanilla sugar… forget sugarplums, I’ve got visions of butterballs dancing in my head. ;)

A pile of these make a delicious gift, whether birthday, holiday, or hostess. And although they are sugar-coated show-stoppers, the recipe is actually quite simple — only seven ingredients and a bit of planning involved. My fourteen-year-old just made his first solo batch for a local cookie contest (he won), and he seconds my infatuation. Can cookies sparkle? I think these might…

butterballs2

Vanilla Bean Butterballs with Chocolate Ganache
makes 18 sandwich cookies

For shortbread:
1 c. unsalted butter, softened (2 sticks)
1/2 c. granulated sugar
1 3/4 c. all-purpose flour
3/4 tsp. salt (not coarse)
1 tsp. vanilla bean paste or real vanilla extract
about 2 c. vanilla sugar for rolling (see Recipe Notes below)

For chocolate ganache filling:
4 oz. quality semi-sweet chocolate (I like Ghiradelli or Scharffen Berger)
1/3 c. heavy cream
1/4 tsp. salt (not coarse)

With the whisk of an electric mixer, beat the butter until soft and fluffy, about three minutes. Add granulated sugar, salt, and vanilla, and mix again until well-blended. Stir in the flour by hand until it forms a soft dough. Shape dough into a disc, wrap in plastic, and chill for at least 3 hours, up to a week.

Working with well-chilled dough, break off teaspoon-size piece and roll into 36 balls about 3/4″ across. (Making them uniform in size is more important than their exact diameter.) Place balls on wax/parchment-paper lined plate and freeze for 30 minutes. While they are in the freezer, make the chocolate ganache for the filling.

Place chocolate, cream, and salt in small pan over medium heat, stirring. Remove from heat as soon as chocolate melts and combines with cream into a glossy mixture. Transfer ganache to a bowl and refrigerate until the consistency of thick pudding. (It needs to be stiff enough to hold your cookie sandwiches together.)

Preheat oven to 375F. Place balls of chilled dough about two inches apart on cookie sheets and bake 10-12 minutes. Cook just until set but not browned. While cookies cool on baking sheets, place vanilla sugar in a shallow bowl for rolling. To assemble, put a smear of ganache on the flat bottom of one cookie, then place another on top. Roll in vanilla sugar until well-coated. I refrigerate mine for at least a half hour afterwards to be sure they are well-stuck, but they can be stored at room temperature after that. (You can also sandwich these with raspberry jam, but the exclusion of chocolate from a recipe is frowned upon by my household…)

Recipe Notes + Tips:
Although you can certainly roll these in plain sugar, I love the added flavor and scent that comes from using vanilla sugar. To make your own, just slice a vanilla bean length-wise and add it to four cups of granulated sugar in an airtight container; wait two or three weeks before using, and whenever you think about it, shake the container to evenly distribute the vanilla. As you use it, add more plain sugar to the container to maintain your supply.

Vanilla sugar is a fantastic addition to your pantry, and there’s no end to its uses: add a teaspoon to your morning tea or coffee; sprinkle it over oatmeal or cream of wheat; give plain yogurt a flavor-boost or blend it into your favorite smoothie; add depth to baked goods from blueberry muffins to lemon bars to apple pie; make a jar of vanilla-cinnamon sugar to use on snickerdoodles, as a topping on grilled peaches, or to caramelize figs… did I mention there’s no end to its uses? :)

butterballs1

This recipe is adapted from one in Gale Gand’s 2006 cookbook Chocolate and Vanilla. As you might guess from the title, half the recipes are chocolate-focused and the other half vanilla, and all of them I’ve tried are delicious. (Clarkson Potter: 2006, ISBN 978-0307238528)

← Older posts
Follow created for joy on WordPress.com

Enter your email address to follow this blog and receive notifications of new posts by email.

Search

Recent Posts

  • Almond Butter and Jam Cookie Sandwiches
  • Bacon and Egg Breakfast Muffins
  • Loving the Kitchen
  • Creamy Chicken Noodles
  • Double Chip Molasses Oatmeal Cookies

Categories

  • Cook (48)
  • Easy-Peasy (3)
  • Make (37)
  • Read (24)
  • Think (20)

Archives

  • October 2013 (1)
  • March 2013 (1)
  • October 2012 (1)
  • August 2012 (6)
  • July 2012 (4)
  • June 2012 (7)
  • May 2012 (4)
  • April 2012 (6)
  • March 2012 (6)
  • February 2012 (9)
  • January 2012 (14)
  • December 2011 (15)
  • November 2011 (17)
  • October 2011 (6)

All original content © Spring Barnickle, Create Joy LLC, & createdforjoy.com, 2011-2014.

Feel free to link to createdforjoy.com or provide excerpts with clear credit and directions to original content; please ask before copying posts or pictures to your site or publication.

Blog at WordPress.com.

Privacy & Cookies: This site uses cookies. By continuing to use this website, you agree to their use.
To find out more, including how to control cookies, see here: Cookie Policy
  • Follow Following
    • created for joy
    • Join 96 other followers
    • Already have a WordPress.com account? Log in now.
    • created for joy
    • Customize
    • Follow Following
    • Sign up
    • Log in
    • Report this content
    • View site in Reader
    • Manage subscriptions
    • Collapse this bar