• Make
  • Cook
  • Read
  • Think
  • My Story

created for joy

~ make today

created for joy

Tag Archives: gluten-free

Butterscotch Banana Sundaes

24 Tuesday Jul 2012

Posted by createdforjoy in Cook

≈ Leave a comment

Tags

banana, bananas foster, butter, butterscotch, cook, gluten-free, ice cream, nostalgia, recipe, sulfite-free, sundae

butterscotchsundae

I was six years old when my love affair with butterscotch began. My grandmother always had a stash of mixed hard candy in the bottom of her purse, and whenever she took me bowling, she would let me dig through her big burgundy handbag in search of cellophane-wrapped goodies. I didn’t mind the occasional peppermint because they reminded me of Christmas, and I insisted on trying to eat the red-hot cinnamon discs, even though they burned my tongue. But the real objects of my affection were little butterscotch rounds, salty and sweet, wrapped in gold and equally treasured.

Fast-forward thirty years, and these sundaes are my ode to butterscotch in all its gooey, buttery glory. The star of the show is homemade butterscotch sauce, spooned over the ice cream and used to make a shortcut version of Bananas Foster to put on top. A handful of crushed salted almonds is all it needs to be positively swoon-worthy.

Butterscotch Banana Sundaes

To make one pint Butterscotch Sauce:
1/2 c. best quality unsalted butter (8 Tbsp. or one stick; I like Cabot Creamery)
2 Tbsp. golden syrup (see these recipe notes for more info; can substitute light corn syrup)
1/4 c. water
3/4 c. granulated sugar
1/4 c. demerara or light brown sugar (I use demerara to stay sulfite-free)
1/2 tsp. salt
1/3 c. heavy cream
1 tsp. vanilla bean paste or real vanilla extract
1/2 tsp. fresh lemon juice

Heat the butter, golden syrup, and water in a medium saucepan over medium heat, stirring until the butter melts completely. Stir in both kinds of sugar and the salt and bring mixture to a boil. Cook until the sauce reaches 245F and turns pale brown, about 7-8 minutes. Remove from heat and carefully stir in heavy cream until completely incorporated. Add vanilla and lemon juice and stir again, then pour into a glass jar and allow to cool. This keeps at room temperature for several days, or it can be stored in the refrigerator for up to two months; simply reheat in microwave before using.

butterscotchsundae

To make four Butterscotch Banana Sundaes:
1/2 c. homemade butterscotch sauce
2 large bananas
1/4 tsp. ground cinnamon
pinch salt
1/2 tsp. fresh lemon juice
2 c. ice cream, preferably all-natural (my favorite flavors with this are vanilla, butter almond, or coffee)
2 Tbsp. crushed salted almonds

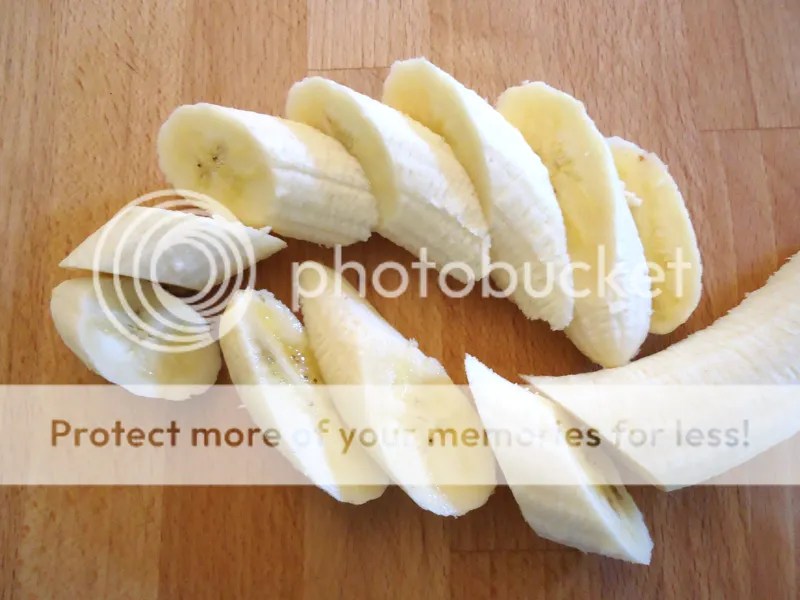
Cut bananas into 1/2″-thick chunks. (I like to slice mine on the bias because I’m fancy like that. ;) In a small sauté pan, stir together 1/4 c. butterscotch sauce, cinnamon, salt, and lemon juice. Heat over medium-low until sauce begins to thin, then add sliced bananas. Cook, stirring occasionally, until bananas soften and start to look blurry around the edges, 2-3 minutes. Remover from heat and set aside until bananas are warm but not hot, so it doesn’t make a complete puddle of your ice cream.

When ready to serve, scoop 1/2 cup of ice cream into each of four small bowls. Spoon one tablespoon plain butterscotch sauce over the top of each serving, then top each sundae with 1/4 of the cooked butterscotch bananas and the warm sauce from the pan. Sprinkle 1/2 tablespoon of almonds over each serving, add a spoon, and enjoy.

Recipe Notes:
My butterscotch sauce recipe is adapted from one in the March 2008 issue of Saveur magazine. Saveur is one of my favorite food magazines, and this recipe came from one of my favorite special issues, entitled “The Beauty of Butter.” My sentiments exactly. ;)

butterscotchsundae

Advertisement

Chocolate Chip Meringues

26 Tuesday Jun 2012

Posted by createdforjoy in Cook

≈ 5 Comments

Tags

bake, chocolate chip, cook, cookies, easy, gluten-free, meringue, recipe, sweet, vanilla

meringues02

It’s a happy thing when practicality and yumminess overlap in the kitchen. That’s the case with this recipe, born of the need to make a gluten-free dessert for dear friends, and helped along by the glut of egg whites in my freezer as a result of making pastry cream the week before. These homemade meringues are sweet, chewy little clouds, flavored with vanilla bean and mini-chocolate chips. They are simple, low-fat, and delicious, and that’s always a winning combo in my book.

I shaped mine with the help of an ice-cream scoop because I love the look of rows of brilliant white puffs, dotted with chocolate chips and sprinkles. However, if you’re feeling fancy, these can also be piped out of a large decorating tip into star shapes or little peaked mounds. They go beautifully with the tartness of summer berries, or served alongside coffee. They’re so easy to make, they almost qualify as an Easy-Peasy Friday recipe, and they are certainly a wonderful friend to have along for the weekend.

meringues03

Chocolate Chip Meringues
makes twenty-four 2″-wide meringues

4 large egg whites
1/2 tsp. cream of tartar
1/4 tsp. salt
1 c. granulated sugar
2 tsp. vanilla bean paste or real vanilla extract
2 c. semisweet mini-chocolate chips
chocolate sprinkles (optional)

Oven 200F. In a large mixing bowl, combine the egg whites, cream of tartar, and salt. Beat until soft peaks begin to form, then gradually add the sugar. Beat several minutes more, until mixture is thick and glossy, adding the vanilla at the end. Stir in the mini-chocolate chips with a silicone spatula.

Using a an ice cream/cookie dough scoop that holds 2-1/2 tablespoons, scoop out mounds of meringue about two inches apart on to parchment-lined baking sheet. Add sprinkles to the tops as desired. Bake for two hours at 200F, until outside of cookies is firm and centers are chewy marshmallow-like consistency. Alternately, pipe meringues into 1-1/2″-wide stars or mounds and bake at 200F for 1-1/2 hours.

Cool completely on baking sheets, then transfer to airtight container and store at room temperature.

meringues01

Island Devil’s Food Cupcakes with Cream Cheese Frosting and Coconut Caramel Drizzle

05 Monday Mar 2012

Posted by createdforjoy in Cook

≈ 3 Comments

Tags

cake, caramel, chocolate, coconut, coconut flour, coconut milk, cook, cream cheese, cupcake, dessert, devil's food, food allergies, frosting, gluten-free, moist, sulfite-free, tender

coconutcupcakes

When my husband, Landon, was in kindergarten, someone’s mother brought a batch of coconut cupcakes to share with the class to celebrate her child’s birthday. Landon had never had coconut before, but he knew a thing or two about baked goods, and he positively drooled over the mounds of fluffy white frosting and clouds of coconut. When his turn came, he eagerly stuffed a bite in his mouth, and then proceeded to experience one of the biggest culinary disappointments of his little life. It seemed someone had accidentally switched out his precious cupcake with a mouthful of dry grass, possibly mixed with bits of shredded string. After he was done retching and spitting (I’m sure the mom and teacher just loved that), he was left with one resounding sentiment: I hate coconut.

Finally, three decades later, comes coconut’s redemption. This recipe was inspired by a bag of coconut flour I spied in the baking aisle at Whole Foods. Coconut flour is made of finely ground dried coconut, so it carries the fruit’s sweet aroma without the fibrous texture. Apparently, it also transforms fairly good cake into something so ridiculously moist that you feel the need to talk with your mouth full in order to urge others to eat it too: “Seriously, mmfff, you have got to try this!”

This recipe started life years ago as one from a King Arthur Flour catalogue, but it doesn’t bear much resemblance to the original now. Coconut flour requires extra liquid, so I figured I might as well stick with the theme and use coconut milk. I think the combination of the two is what is responsible for the tender, almost-melting texture — although frankly, after the first bite, you won’t really care. Their diminutive size and the tang of the cream cheese frosting make it a little more reasonable to finish the tops with a drizzle of caramel, in which I also substituted coconut milk for the regular old cow kind.

You would think something with coconut products present in triplicate would be absolutely redolent with its flavor, but somehow these cupcakes manage to come out only barely scented of the stuff. I did feel the need to nod to the coconut flour in the recipe name, but you really wouldn’t know it was there if I didn’t tell you. In other words, this is the perfect recipe for people conditioned by years of shredded coconut with the mouth-feel of lawn clippings. As an added plus, coconut flour has more fiber and vitamins than wheat flour, and it’s a great alternative for people who eat gluten-free. Something that tastes better than it should, transforms the food it’s in, and is good for you to boot: that’s the kind of culinary alchemy that keeps me happily inventing and baking. Now, seriously, mmmfff, you have got to try these… ;)

coconutcupcakes05

Island Devil’s Food Cupcakes with Cream Cheese Frosting and Coconut Caramel Drizzle
makes about 90 mini-cupcakes

For the cake:
3/4 c. unsalted butter, softened (12 Tbsp. or 1 1/2 sticks)
1 c. demerara sugar (also called turbinado or raw sugar, see these recipe notes for more info)
3/4 c. granulated sugar
3/4 tsp. salt, not coarse
1 1/2 tsp. baking soda
2 tsp. vanilla bean paste or real vanilla extract
2 tsp. espresso powder (optional, enhances the depth of the chocolate flavor)
1 c. all-purpose flour (I prefer King Arthur)
1 c. coconut flour
1 c. unsweetened cocoa powder
4 eggs
one 14 oz.-can coconut milk plus enough regular milk to equal 2 1/2 cups

For frosting:
8 oz. cream cheese, softened
6 Tbsp. unsalted butter, softened (3/4 stick)
4 c. powdered sugar, sifted
1/2 tsp. salt, not coarse
1 tsp. vanilla bean paste or real vanilla extract
2 Tbsp. coconut milk or regular milk

For caramel:
1 Tbsp. unsalted butter
1/2 c. demerara sugar
1 c. coconut milk
1/2 tsp. salt, not coarse

Oven 350F. Use electric mixer to blend butter, demerara sugar, granulated sugar, salt, baking soda, vanilla, and espresso powder until light and fluffy, 5 or 6 minutes. Scrape the sides of the bowl with a silicone spatula once or twice to be sure it blends evenly. Meanwhile, in a medium mixing bowl, whisk together both types of flour and cocoa and set aside.

Add the can of coconut milk to a large measuring cup, then add regular milk until it totals 2 1/2 cups. Now whisk them together until evenly mixed. (The coconut milk always separates in the can. Don’t let this put you off, it’s just the water coming out of the thicker part of the fruit puree.) Add a third of the flour mixture to the cake batter, then mix well. Add half the milk, then mix again. Alternate this way until all ingredients are completed blended into a thick, fragrant batter.

Line a mini-muffin tin with paper liners, then put one teaspoon of batter in each cup. (I use a small ice-cream scoop for this.) Bake mini-cupcakes for 12-13 minutes, until a toothpick inserted in the center comes out with the faintest hint of moist crumbs. Let cool in pan for one minute, then transfer to baking rack to cool completely. Repeat as needed until all batter is baked, about four batches for my 24-cupcake pan.

While the cupcakes bake, make the caramel. Cook the butter, sugar, and salt in a small saucepan over medium heat, whisking constantly, until sugar melts (3-4 minutes). Carefully pour in the coconut milk — it will bubble and splash furiously, so be careful that you don’t get burned. Some of the melted sugar may solidify in the bottom of the pan or on the whisk. Every time I make caramel, this is the moment that I have doubts, but trust chemistry and soldier on. Keep stirring constantly as it simmers over low heat for seven minutes (use a timer, no skimping). The caramel will smooth and thicken. Turn off the heat, stir in the vanilla, and leave in the pan to cool.

While the caramel and cupcakes cool, it’s time for frosting. Put the butter, cream cheese, vanilla, and salt in a large mixing bowl and beat with an electric mixer until lighter and thoroughly mixed, 2-3 minutes. Add half the sifted powdered sugar and mix well. Add coconut milk, mix again, then last half of sugar. Mix until completely combined to a creamy spreading consistency.

Gently frost cooled cupcakes, leaving a bit of a well in the top where the caramel can pool. Drizzle the frosted cupcakes with cooled caramel, then top with chocolate sprinkles or toasted coconut shavings as desired. I made these small for three reasons: I love tiny baked goods; these are very rich; and smaller servings help my family better control portion size. It’s hard to walk away from half a regular-sized cupcake, but having one or two of the minis feels like plenty.

If you prefer a traditional-sized cupcake, I would estimate baking time at around 25 minutes, but start testing a few minutes before to be sure they don’t dry out. If you want to make this recipe gluten-free, use 2 cups coconut flour (instead of 1 c. coconut flour, 1 c. all-purpose) and add an additional 1 c. of either coconut milk or regular milk; bake and assemble as directed above.

coconutcupcakes07

Angela’s Sugar and Spice Pecans

01 Sunday Jan 2012

Posted by createdforjoy in Cook, Think

≈ 2 Comments

Tags

cinnamon, cook, courage, food allergies, gluten-free, hope, new year, pecans, possibility, spice, sugar, sulfite-free

pecans2

It takes courage to cook for me. Severe food allergies can make the kitchen feel like a minefield — it requires a lot of attention to detail on the cook’s part (and a lot of trust on mine) to voluntarily enter this realm of label reading and ingredient monitoring. I love to cook and I love to feed other people, so I can understand that it must be frustrating to my friends and family for me to feel so off-limits when it comes to any kind of culinary care-giving.

This recipe is delicious, but it will always be among my favorites because it’s the first food gift anyone ever gave me after the onset of my food allergies in 2007. Angela certainly knew what she was getting into — she’s seen me through dozens of anaphylaxis episodes over the years and has even had the dubious honor of administering my epi-pen. It takes a real friend to stab you in the thigh with a syringe; it takes an even better one to make you food afterward, when she knows what’s at stake.

These only require a handful of ingredients, but the results are snacking perfection: salty-sweet, satisfyingly crunchy, warm with cinnamon and allspice. They have the added bonus of being gluten-free, sulfite-free, and stress-free. Everyone loves them, even the self-professed nut-haters. (You know who you are.)

For me, this recipe is just the right way to start off the new year because they are all about Possibility. The beautiful thing about hope is that it can bloom so unexpectedly: after a long, dark winter, in the midst of life’s compost. It can even come in the shape of a cellophane bag full of spiced pecans. When you make and share this recipe, I hope you can also share in a little piece of the comfort and faith they represent for me.

pecans3

Angela’s Sugar and Spice Pecans
makes 3 cups

1 large egg white
3/4 c. granulated sugar or vanilla sugar (see these Recipe Notes for vanilla sugar how-to)
1 tsp. ground cinnamon
1/4 tsp. ground allspice
3/4 tsp. salt (not coarse)
3 c. pecans

Oven 250F. In medium mixing bowl, beat egg white with whisk or electric mixer until it holds stiff peaks. In separate small mixing bowl, stir together sugar, salt, cinnamon, and allspice until thoroughly mixed. Fold pecans into egg white until they are coated. Don’t stir too energetically, you don’t want to lose all that air you just whipped into the egg white. Sprinkle in the sugar-spice mixture, stirring until all pecans are thoroughly coated with thick, gooey cinnamon yum. (That’s a very technical cooking term, I know. ;)

Spread out pecans in even layer on large parchment-lined baking sheet. (You can try it without parchment, but butter your baking sheet copiously and get someone else to do the dishes.) Bake for 45 minutes, stirring thoroughly every 15 minutes with silicon spatula to bring the gooey bits to the surface. Add an extra 15 minutes baking time if they are not crispy and dry at the end of the 45 minutes; if your oven doesn’t maintain low temperatures well, it may take longer. Allow to cool on baking sheet completely before eating or storing in an airtight container at room temperature for up to 4 weeks.

Quick tip: this recipe easily doubles, just use larger bowls to mix and bake for a full hour. If you make more than a double batch, bake on two cookie sheets to be sure your layer of nuts is not too thick.

Prayers and wishes for a healthy, happy, fulfilling 2012 for you and yours. :)

Chewy Almond Macaroons

22 Thursday Dec 2011

Posted by createdforjoy in Cook

≈ Leave a comment

Tags

almond paste, almonds, chewy, cookies, gluten-free, holiday baking, macaroons, sweet tooth

macaroonsmainb

Fair warning: only those with a sizable sweet tooth need apply. But somehow these cookies manage to be both decadently sweet and pleasantly light. They look like your average sugar cookie, but then the scent of almond gives away their secret identity. The first bite tells the rest of the story: crispy, crackly edges give way to rich, chewy centers… soon all that’s left is a dusting of powdered sugar on your fingertips and a satisfied smile on your face. And to me, that’s what baking is all about. :)

(I could have easily titled this post Almond Obsession Part 2, since I already indulged myself last week with the Cherry Jam and Almond Cookie Bars. If you’ve seen the light and bought your own case of almond paste, you’re going to love these…)

macaroons1

Chewy Almond Macaroons
makes 36 cookies

21 oz. almond paste (see cookie bar Recipe Notes for more info)
2 c. granulated sugar
3/4 tsp. salt (not coarse)
4 large egg whites, lightly beaten
1 tsp. almond extract
sifted confectioner’s sugar for topping

Oven 325F. Blend the almond paste, sugar, and salt with electric mixer until well-mixed and crumbly. Add egg whites and almond extract and mix again until the dough is a smooth, sticky paste. Using two spoons, scoop the dough by heaped tablespoons on to lightly greased or parchment-lined baking sheets. Leave two inches between each, as cookies will spread quite a bit.

Generously sift powdered sugar over the tops of each little mound of cookie dough. (I love this part — it looks like a little snow-topped mountain range.) Use three fingers to press each cookie a little flatter. Bake for about 20 minutes, until edges are lightly browned and crispy. Remove from oven and allow to cool in the pans, then eat one and transfer the rest to an airtight container. :)

Recipe Notes + Tips:
Many Americans associate macaroons with coconut, but the term macaroon (from the French macaron) refers to any cookie which uses ground nuts and egg white as binding agents instead of flour and whole eggs. Although macaroons include ground nuts or sweetened nut pastes for the body of the cookie, flavors can range from berry to citrus, chocolate to coffee.

Macaroons are super simple to make and are a great gluten-free alternative. This recipe easily halves or doubles, and the cookies can be frozen, well-wrapped, for up to three months. My thanks for recipe inspiration go to King Arthur Flour yet again, this time for their bakery’s Almond Bianchi cookies.

macaroons2

Follow created for joy on WordPress.com

Enter your email address to follow this blog and receive notifications of new posts by email.

Search

Recent Posts

  • Almond Butter and Jam Cookie Sandwiches
  • Bacon and Egg Breakfast Muffins
  • Loving the Kitchen
  • Creamy Chicken Noodles
  • Double Chip Molasses Oatmeal Cookies

Categories

  • Cook (48)
  • Easy-Peasy (3)
  • Make (37)
  • Read (24)
  • Think (20)

Archives

  • October 2013 (1)
  • March 2013 (1)
  • October 2012 (1)
  • August 2012 (6)
  • July 2012 (4)
  • June 2012 (7)
  • May 2012 (4)
  • April 2012 (6)
  • March 2012 (6)
  • February 2012 (9)
  • January 2012 (14)
  • December 2011 (15)
  • November 2011 (17)
  • October 2011 (6)

All original content © Spring Barnickle, Create Joy LLC, & createdforjoy.com, 2011-2014.

Feel free to link to createdforjoy.com or provide excerpts with clear credit and directions to original content; please ask before copying posts or pictures to your site or publication.

Blog at WordPress.com.

Privacy & Cookies: This site uses cookies. By continuing to use this website, you agree to their use.
To find out more, including how to control cookies, see here: Cookie Policy
  • Follow Following
    • created for joy
    • Join 96 other followers
    • Already have a WordPress.com account? Log in now.
    • created for joy
    • Customize
    • Follow Following
    • Sign up
    • Log in
    • Report this content
    • View site in Reader
    • Manage subscriptions
    • Collapse this bar