• Make
  • Cook
  • Read
  • Think
  • My Story

created for joy

~ make today

created for joy

Tag Archives: recipe

Almond Butter and Jam Cookie Sandwiches

26 Saturday Oct 2013

Posted by createdforjoy in Cook

≈ 1 Comment

Tags

almond, almond butter, almond cookies, baking, chocolate, cook, cookies, ganache, holiday baking, jam, jelly, pbj, recipe, sammies, sandwiches, shortbread

Almond Butter and Jam Cookie Sandwiches

I wasn’t one of those kids who wanted a PBJ sandwich in my lunchbox every day — I was more of a bologna and Kraft cheese kind of gal. (Don’t judge, people change.) And yet, there is still something innately comforting to me about the combination of peanut butter and jelly. These cookies are my attempt to combine that sense of comfort and familiarity with a set of ingredients that better match my grown-up palate.

It doesn’t take long to figure out I’m a little bit of an almond fanatic, so it was an easy leap for me to substitute almond butter in my cookie sandwiches. With apologies to George Washington Carver and the state of Georgia, I much prefer the sweet, cherry-like nuttiness of almonds to their legume counterparts.

For the filling, I chose two options: triple berry conserve, and chocolate ganache. (For traditional ganache, try this recipe, or go a little more high-falutin’ with a creme fraiche ganache here.) Both were great partners for the slightly savory notes of these tender shortbread rounds.

I love these because they are special without being complicated, small without feeling too precious. And let’s face it: no one can resist a tiny little cookie sandwich. There will always be a place on my table for the kind of food that brings out the kid in all of us.

Almond Butter Sammies In Progress

Almond Butter and Jam Cookie Sandwiches
makes 24 cookie sandwiches

1 c. unsalted butter, softened (2 sticks)
1/2 c. all-natural almond butter (I love Justin’s Nut Butters)
1/2 c. demerara or light brown sugar
1/2 tsp. fine salt
2 c. all-purpose flour (I prefer King Arthur)
granulated sugar for dipping
1/2 c. filling of your choice — jam, chocolate ganache, Nutella, or frosting
(It’s probably rather telling that I always have at least three of the four above on hand.)

Oven 325F. Line a baking sheet pan with parchment and set aside.

Cream together butter, almond butter, demerara sugar, and salt with an electric mixer on medium-high until well-combined. Gradually beat in half the flour, then stir in the remaining flour by hand.

On a piece of waxed paper, pat the dough out into a 6″x8″ rectangle and cut into 48 equal pieces, about 1″-square each. Roll pieces into balls, and place two inches apart on the cookie sheet. Dip the flat bottom of a glass or measuring cup in granulated sugar, then press the balls to flatten them to about 1/4″ in thickness.

Bake 12-14 minutes, until they are lightly brown and the centers are set. You will know they are done because they lose their shine. Remove from oven and allow to cool on baking sheet for five minutes, then remove to a rack to cool completely. Once cool, scoop about a teaspoon of filling on to a cookie, then sandwich with another. Do this like a good parent — gentle, but firm.

Store in an airtight container up to three days. Or freeze, well-wrapped, up to a month, then defrost at room temperature before serving. This is the perfect recipe to get a leg up on your holiday baking…

Cookies Waiting for Filling

Advertisement

Bacon and Egg Breakfast Muffins

24 Sunday Mar 2013

Posted by createdforjoy in Cook

≈ 1 Comment

Tags

bacon, breakfast, brunch, cheddar, cook, eggs, maple syrup, muffins, mustard powder, recipe, scrambled eggs.cheese, self-rising flour

Bacon and Egg Breakfast Muffins

Hello, again! :) After a five-month hiatus to care for my newborn business, I am finally back to a more balanced routine that includes such luxuries as weekends off. That means I am also back to Saturday Morning Baking, one of my favorite times of the week. And what better way to celebrate both the beginning of a new endeavor and the start of a new day than with these scrumptious breakfast goodies?

Full of bacon, eggs, and cheese, and glazed with maple syrup, this recipe has everything I love about breakfast in one convenient little package. It also uses self-rising flour, a real time-saver that makes these muffins feasible even when there’s a hungry crowd waiting. Their savory, biscuit-like layers are also a great way to introduce a little more protein into the diet of finicky eaters who might normally object to scrambled eggs or cheese.

Most important of all, they are plain old delicious. I am a strong proponent of breakfast all day long, but your main challenge will just be hanging on to some of these long enough for them to qualify as brunch!

Breakfast Muffins waiting to be baked

Bacon and Egg Breakfast Muffins
makes 12 muffins

4 eggs, scrambled and coarsely chopped
12 oz. cooked bacon (about 12 slices), chopped
2 c. self-rising flour (I prefer King Arthur)
1/2 tsp. dry mustard powder
1/2 tsp. ground black pepper
1/8 tsp. cayenne powder (optional)
1 1/4 c. finely shredded sharp cheddar cheese
3/4 c. milk
1/4 c. vegetable or canola oil
1 raw egg
1/4 c. maple syrup

Oven 400F. Line a muffin pan with paper or silicone liners. Spray inside of liners lightly with canola oil or cooking spray.

In medium-size mixing bowl, whisk together flour, mustard powder, black pepper, and cayenne if using. Add 3/4 c. grated cheese, eggs, and bacon and stir again. In small mixing bowl, whisk together remaining raw egg, milk, and oil. Whisk the wet ingredients into the dry just until blended; there will be lumps, but it is important to avoid over-mixing.

Spoon muffin batter into prepared pan, filling each cup 2/3 full. (I find an ice-cream scoop works well to get even portions.) Sprinkle with remaining 1/2 cup finely grated cheese. Bake the muffins 20-25 minutes, until lightly browned and toothpick inserted in center comes out clean.

Allow baked muffins to rest in pan for five minutes, then turn on to baking rack. Brush the tops with the maple syrup and serve warm. (And by warm, I mean immediately. ;)

Bacon and Egg Breakfast Muffins

Inspired by a recipe from King Arthur Flour; I highly recommend their blog for weekly cooking inspiration.

Loving the Kitchen

19 Friday Oct 2012

Posted by createdforjoy in Cook, Make

≈ 2 Comments

Tags

calm, cook, journal, joy, kitchen, make, recipe, scrapbook

recipe journal cover

Thanks to a fantastic response from our backers on Kickstarter, my new business Kerfluffles Marshmallows got off to a wonderful start. I so appreciate everyone who supported me with feedback and purchases. Now comes many weeks in the kitchen making handmade bites of fluffy goodness to fulfill all our backer pledges and the orders coming in on the web site. I can’t wait!

In honor of the months ahead, I thought it was a great time to blog about a recipe journal I made recently as a birthday gift. The front is titled appropriately: Ten Things I Love About Being In the Kitchen. The recipient is a dear friend who makes my world a gentler, more loving place, and who also shares my enthusiasm for cooking and baking.

recipe journal page 01

The journal pages are each folded pockets containing blank, embellished recipe cards for her to add her own family favorites. I took a cue from the vintage-style printed cardstock and further aged the covers, pockets, and recipe cards by sanding the papers and staining the edges with chocolate-colored ink.

recipe journal blank pages

For me, time in the kitchen is much like time in the studio: creative, inspiring, and nurturing. Even when I am not alone — when there is a house full of guests and multiple conversations and dishes bubbling away — somehow the kitchen manages to be a place of quiet for me.

recipe journal back cover

Maybe that’s one way to define love, when calm and joy exist regardless of circumstances. I do love being in the kitchen: the feathery softness of flour, the minuscule crunch of vanilla bean, watching a sauce thicken as it simmers. I love the details and the preparation, the sharing and smiles. Wishing you that same feeling today, in your kitchen and beyond. :)

recipe journal page 02

Double Chip Molasses Oatmeal Cookies

23 Thursday Aug 2012

Posted by createdforjoy in Cook

≈ Leave a comment

Tags

allspice, chewy, chocolate chips, cinnamon, cook, cookies, ginger, molasses, oatmeal, recipe, sulfite-free, white chocolate chips, whole wheat flour

OatmealCookies

I’ll warn you up front: if you think it’s possible to have too many chocolate chips in a cookie, this isn’t the recipe for you. Ditto if you like your oatmeal cookies crunchy, or only vaguely spice-scented. Subtle flavor and smooth texture? Not so much.

However, if you want a dense, chewy, chocolate chip festival, full of rubbly mounds of oats and chips, keep reading. If you crave a cookie with plenty of cinnamon, allspice, and ginger, combined with the smoky sweetness of molasses: this is the one. And if you’d like to mollify your conscience just a wee bit by using whole wheat flour, well then, have I got a treat for you! :)

Double Chip Molasses Oatmeal Cookies
makes about 30 cookies

1/2 c. unsalted butter (one stick), softened
1/4 c. granulated sugar
1/3 c. turbinado or light brown sugar
1 tsp. ground cinnamon
1/4 tsp. ground allspice
1/2 tsp. ground ginger
1/2 tsp. coarse sea salt
1/2 tsp. baking soda
1 tsp. vanilla bean paste or real vanilla extract
1 large egg
3 Tbsp. unsulphured molasses
3/4 c. whole wheat or all-purpose flour (I like King Arthur White Whole Wheat here)
1 1/2 c. rolled oats (not quick cook)
1 1/2 c. chocolate chips (I use 3/4 c. semisweet and 3/4 c. white)

Beat together butter, sugars, spices, salt, baking soda, and vanilla with electric mixer until smooth and evenly incorporated. Beat in egg, then molasses, scraping down the sides of the bowl after each addition. Stir in the flour until completely combined, then stir in oats. Add chips and stir again. Cover dough and refrigerate for an hour or two, until chilled and firm.

Oven 375F. Drop dough by tablespoonful on to parchment-lined or lightly greased cookie sheet. Bake ten minutes per batch, until cookies begin to brown and centers are completely set. Allow to cool on pans for a few minutes, then transfer to cooling racks. Enjoy warm and gooey, or cool completely and store in airtight container.

(Quick tip: if cookies begin to dry out, place a small slice of apple into the container with them until they are tender again.)

Recipe Notes:
If you’re doubling this recipe, you may find double the molasses a bit overpowering. Consider using three tablespoons of molasses and three tablespoons honey or golden syrup instead. If you like nuts, switch out 1/2 cup of the chocolate chips for a 1/2 cup toasted pecans or walnuts.

Raspberry Dutch Baby

13 Monday Aug 2012

Posted by createdforjoy in Cook

≈ 1 Comment

Tags

all-natural, apples, blueberries, blueberry, breakfast, brunch, cook, creme fraiche, dutch baby, easy, egg, morning, pancake, pears, popover, raspberries, raspberry, recipe

dutchbaby

Monday morning of our second week of school dawned stormy and gray, not the best encouragement to get out of bed for little bodies still on their sleepy summertime schedule. This Raspberry Dutch Baby was the perfect way to brighten up the start of our day. A dutch baby is a cross between a pancake and a popover, eggy and fruity, with a hint of sweetness and cinnamon. It comes together in five minutes, but between the golden brown dome and a sprinkling of powdered sugar, it makes morning feel like a special occasion.

In the summer, you can easily substitute blueberries or peach slices for the raspberries, and it tastes lovely with apples or pears in the fall. For another yummy variation, try substituting ground nutmeg and ginger for the cinnamon. We like ours with a dollop of creme fraiche on top, but vanilla yogurt or whipped cream work as well. Guaranteed morning sunshine, regardless of the weather. :)

dutchbaby

Raspberry Dutch Baby
serves 6-8

1 c. raspberries, rinsed
2 Tbsp. unsalted butter
3 Tbsp. granulated sugar, divided
3 large eggs
1/2 c. milk
1/2 c. all-purpose flour
1/2 tsp. cinnamon
1/2 tsp. vanilla bean paste or real vanilla extract
dash of salt
a few teaspoons powdered sugar to sift over the top
a few teaspoons creme fraiche or vanilla yogurt to serve

Oven 450F. Cut the butter into two pieces and place in small glass or ceramic baking dish. (I use either a 9″x6″ oval or a 9″-round dish.) Place the dish in the preheated oven for the butter to melt while you finish the remaining steps, about five minutes.

In a small bowl, mix the raspberries with two tablespoons of the sugar, breaking up a few of the berries so they better release their juices, and set aside. In a blender, mix remaining tablespoon of sugar, eggs, milk, flour, cinnamon, vanilla, and salt. Blend on medium speed for one minute, until thoroughly mixed and a bit frothy.

Carefully remove the hot baking dish from the oven and pour in the batter. Scatter the berries and their juice over the top, then place in oven and bake 17-18 minutes, until edges are puffed and golden brown and center is completely set. (My oven cooks a bit hotter toward the front, so I rotate the dish halfway through.)

Sift powdered sugar over the top and serve immediately with a dollop of creme fraiche or yogurt on top. This does not save well, so be generous. :)

Recipe Notes:
If you would like to use a cup of thinly sliced apples or pears instead of berries, then the directions change slightly. While the butter is melting in the baking dish in the oven, toss the fruit with two tablespoons sugar, an extra 1/4 tsp. of ground cinnamon, and a grating of fresh nutmeg. Arrange the fruit slices evenly in the melted butter and bake for 10-12 minutes, until softened. Prepare the batter as directed above, then pour over the cooked sliced fruit. Bake 17-18 minutes more, then serve as described for the berry version.

dutchbaby

Easy-Peasy Friday: Slow-Roasted Tomatoes

10 Friday Aug 2012

Posted by createdforjoy in Cook, Easy-Peasy

≈ 5 Comments

Tags

cook, easy, easy-peasy, farmer's market, heirloom, quick, recipe, roasted, simple, slow-roasted, summer, tomatoes

tomatoes

With the plethora of tiny tomatoes available at the market right now, it’s the perfect time for a batch of these slow-roasted beauties. I found a rainbow of locally grown, organic baby heirlooms at a fantastic price, but traditional cherry or grape tomatoes work just as well. The key to this recipe is the low, slow cooking, which coaxes every bit of sweetness and flavor out of the fruit.

What makes this recipe easy-peasy is that the tomatoes are placed in a preheated oven which is then promptly turned off, so that they are left to roast slowly overnight as the heat of the oven dissipates. This fix-it-and-forget-it roasting method is the brainchild of Nigella Lawson, one of my favorite cookbook authors, who devoted an entire cookbook to easy-peasy recipes: Nigella Express: 130 Recipe for Good Food, Fast.

The question is not what you can do with a pint of these, but really what you can’t. They lend instant credibility to any green salad and make a lovely partner for pasta. Add a handful of freshly chopped basil, and they become a quick bruschetta topping. I love them on pizza with no more than goat cheese and a glug of olive oil. They’re also delicious stirred into tuna or chicken salad for a Mediterranean feel. I’d love to hear how you use yours. :)

tomatoes

Easy-Peasy Slow-Roasted Tomatoes
makes one pint

1) Preheat your oven to 475F while you wash and halve one pint of tomatoes.

2) Place the tomatoes in a ceramic or glass oven-safe dish and toss with 1/4 cup extra virgin olive oil; 1/2 teaspoon each coarse salt, pepper, and granulated sugar; 1/4 teaspoon garlic powder; and 1 teaspoon dried thyme.

3) Place the tomatoes in the preheated oven and turn off the heat. Leave for at least six hours, preferably overnight. Finished tomatoes can be stored in the refrigerator in a glass jar for up to two weeks. (Don’t forget to spoon the seasoned oil and cooking juices into the jar with them — yum!)

A last note: more than once, I have forgotten I put a batch of these in the oven the night before. Usually I make the discovery when I preheat the oven for another recipe and find the lovely scent of caramelizing tomatoes in the air. However, I once rediscovered them after preheating the oven to broil. The tomatoes were charcoal, my roasting dish was never the same, and now I put a post-it note on the oven to remind me I have them in there. (I am sure none of you would ever be so forgetful, but I thought I’d share anyway. ;)

olive oil

Butterscotch Banana Sundaes

24 Tuesday Jul 2012

Posted by createdforjoy in Cook

≈ Leave a comment

Tags

banana, bananas foster, butter, butterscotch, cook, gluten-free, ice cream, nostalgia, recipe, sulfite-free, sundae

butterscotchsundae

I was six years old when my love affair with butterscotch began. My grandmother always had a stash of mixed hard candy in the bottom of her purse, and whenever she took me bowling, she would let me dig through her big burgundy handbag in search of cellophane-wrapped goodies. I didn’t mind the occasional peppermint because they reminded me of Christmas, and I insisted on trying to eat the red-hot cinnamon discs, even though they burned my tongue. But the real objects of my affection were little butterscotch rounds, salty and sweet, wrapped in gold and equally treasured.

Fast-forward thirty years, and these sundaes are my ode to butterscotch in all its gooey, buttery glory. The star of the show is homemade butterscotch sauce, spooned over the ice cream and used to make a shortcut version of Bananas Foster to put on top. A handful of crushed salted almonds is all it needs to be positively swoon-worthy.

Butterscotch Banana Sundaes

To make one pint Butterscotch Sauce:
1/2 c. best quality unsalted butter (8 Tbsp. or one stick; I like Cabot Creamery)
2 Tbsp. golden syrup (see these recipe notes for more info; can substitute light corn syrup)
1/4 c. water
3/4 c. granulated sugar
1/4 c. demerara or light brown sugar (I use demerara to stay sulfite-free)
1/2 tsp. salt
1/3 c. heavy cream
1 tsp. vanilla bean paste or real vanilla extract
1/2 tsp. fresh lemon juice

Heat the butter, golden syrup, and water in a medium saucepan over medium heat, stirring until the butter melts completely. Stir in both kinds of sugar and the salt and bring mixture to a boil. Cook until the sauce reaches 245F and turns pale brown, about 7-8 minutes. Remove from heat and carefully stir in heavy cream until completely incorporated. Add vanilla and lemon juice and stir again, then pour into a glass jar and allow to cool. This keeps at room temperature for several days, or it can be stored in the refrigerator for up to two months; simply reheat in microwave before using.

butterscotchsundae

To make four Butterscotch Banana Sundaes:
1/2 c. homemade butterscotch sauce
2 large bananas
1/4 tsp. ground cinnamon
pinch salt
1/2 tsp. fresh lemon juice
2 c. ice cream, preferably all-natural (my favorite flavors with this are vanilla, butter almond, or coffee)
2 Tbsp. crushed salted almonds

Cut bananas into 1/2″-thick chunks. (I like to slice mine on the bias because I’m fancy like that. ;) In a small sauté pan, stir together 1/4 c. butterscotch sauce, cinnamon, salt, and lemon juice. Heat over medium-low until sauce begins to thin, then add sliced bananas. Cook, stirring occasionally, until bananas soften and start to look blurry around the edges, 2-3 minutes. Remover from heat and set aside until bananas are warm but not hot, so it doesn’t make a complete puddle of your ice cream.

When ready to serve, scoop 1/2 cup of ice cream into each of four small bowls. Spoon one tablespoon plain butterscotch sauce over the top of each serving, then top each sundae with 1/4 of the cooked butterscotch bananas and the warm sauce from the pan. Sprinkle 1/2 tablespoon of almonds over each serving, add a spoon, and enjoy.

Recipe Notes:
My butterscotch sauce recipe is adapted from one in the March 2008 issue of Saveur magazine. Saveur is one of my favorite food magazines, and this recipe came from one of my favorite special issues, entitled “The Beauty of Butter.” My sentiments exactly. ;)

butterscotchsundae

Berries and Cream Steel-cut Oatmeal

04 Wednesday Jul 2012

Posted by createdforjoy in Cook

≈ Leave a comment

Tags

berries, blueberries, breakfast, brunch, cherries, cook, cream, Independence Day, July 4th, oatmeal, recipe, steel-cut oats

oatmeal02

What would July 4th be without a little red, white, and blue? In this case, the patriotic ingredients are fresh, bright cherries and blueberries, drizzled with buttery cream. Steel-cut oats are nutty, chewy little nuggets that pack a nutritional punch and make for a comforting, yummy breakfast when simmered with milk and a touch of cinnamon. We are big fans of them around here, and their extra texture and flavor elevate them over their more-processed cousin, rolled oats. Whether you stayed up too late last night, or got up too early this morning, a bowl of creamy steel-cut oatmeal topped with chunks of fresh fruit is nothing less than transformative.

This is lovely with cherries and berries, but if you don’t have fresh fruit on hand, swirl a spoonful of your favorite jam or preserves into your bowl instead. Use your imagination, as any seasonal fruit and nut combination will work. My favorite duos are pears and ginger; peaches with a dash of nutmeg; or a spoonful of Caramel Apple Butter and a sprinkling of toasted pecans. Simple, filling, and delicious.

oatmeal01

Berries and Cream Steel-cut Oatmeal
serves 4-6

1 c. steel-cut oats
2 Tbsp. unsalted butter
3 c. milk
1/2 tsp. salt
1 tsp. ground cinnamon
1/4 c. turbinado or brown sugar
2 Tbsp. real maple syrup
1/2 c. fresh blueberries
1 c. pitted fresh cherries, coarsely chopped
1/4 c. heavy cream

In medium heavy saucepan, melt butter over medium heat. Stir steel-cut oats into butter, then allow to toast for a minute or two, until the oats are lightly browned and smell nutty. Stir in salt, sugar, syrup, and cinnamon until well-mixed, then pour in milk. Bring to boil, then lower heat and simmer slowly for 30-35 minutes, stirring often, until oats are tender with chewy centers, and oatmeal is thick and creamy.

Taste for seasoning — it may need a touch more salt or sugar, depending on the oats themselves. Serve oatmeal hot with a generous heap of berries and cherries on top and a drizzle of heavy cream.

Chocolate Chip Meringues

26 Tuesday Jun 2012

Posted by createdforjoy in Cook

≈ 5 Comments

Tags

bake, chocolate chip, cook, cookies, easy, gluten-free, meringue, recipe, sweet, vanilla

meringues02

It’s a happy thing when practicality and yumminess overlap in the kitchen. That’s the case with this recipe, born of the need to make a gluten-free dessert for dear friends, and helped along by the glut of egg whites in my freezer as a result of making pastry cream the week before. These homemade meringues are sweet, chewy little clouds, flavored with vanilla bean and mini-chocolate chips. They are simple, low-fat, and delicious, and that’s always a winning combo in my book.

I shaped mine with the help of an ice-cream scoop because I love the look of rows of brilliant white puffs, dotted with chocolate chips and sprinkles. However, if you’re feeling fancy, these can also be piped out of a large decorating tip into star shapes or little peaked mounds. They go beautifully with the tartness of summer berries, or served alongside coffee. They’re so easy to make, they almost qualify as an Easy-Peasy Friday recipe, and they are certainly a wonderful friend to have along for the weekend.

meringues03

Chocolate Chip Meringues
makes twenty-four 2″-wide meringues

4 large egg whites
1/2 tsp. cream of tartar
1/4 tsp. salt
1 c. granulated sugar
2 tsp. vanilla bean paste or real vanilla extract
2 c. semisweet mini-chocolate chips
chocolate sprinkles (optional)

Oven 200F. In a large mixing bowl, combine the egg whites, cream of tartar, and salt. Beat until soft peaks begin to form, then gradually add the sugar. Beat several minutes more, until mixture is thick and glossy, adding the vanilla at the end. Stir in the mini-chocolate chips with a silicone spatula.

Using a an ice cream/cookie dough scoop that holds 2-1/2 tablespoons, scoop out mounds of meringue about two inches apart on to parchment-lined baking sheet. Add sprinkles to the tops as desired. Bake for two hours at 200F, until outside of cookies is firm and centers are chewy marshmallow-like consistency. Alternately, pipe meringues into 1-1/2″-wide stars or mounds and bake at 200F for 1-1/2 hours.

Cool completely on baking sheets, then transfer to airtight container and store at room temperature.

meringues01

Blueberry Tart

06 Wednesday Jun 2012

Posted by createdforjoy in Cook, Read

≈ Leave a comment

Tags

bake, banana, blueberries, blueberry, butterscotch, cook, cream cheese, lemon curd, pastry, pastry cream, recipe, summer, tart, white chocolate

blueberrytartmain

With blueberry season about to start in earnest, this recipe is sure to have a place on your summer table. It is more nuanced than its simple two-word title might lead you to believe: a flaky cream cheese pastry crust scented with fresh lemon zest; white chocolate pastry cream, somehow both rich and light at once; and a layer of sweet, ripe blueberries. Taking a bite of this tart makes me want to turn Iron Chef judge and say ridiculous, completely true things like, “I feel as if I’m tasting blueberries for the first time.”

This may not be the right recipe in its entirety for the novice or hurried baker, so do what pleases you without bringing frustration. I assure you no one will complain if you crumble store-bought shortbread in a glass and top it with pastry cream and berries. (Indeed, no one in my house would complain if you simply handed them a bowl of pastry cream and a spoon.) Or try your hand at the homemade crust this time, and fill it with a thin layer of purchased lemon curd, then top with berries and whipped cream. At the end of the day, a recipe is a success only when it puts both delicious food on the plate and a smile on the cook’s face.

A final note: you’ll notice the recipe below produces enough pastry for two 9″ tarts. I actually doubled the pastry cream recipe and baked and assembled two tarts, as we had company coming twice in one week. However, if you’d rather make just one tart, freeze the remaining uncooked pastry for use another time. It’s a lovely, useful thing to have on hand. And should you find yourself with some leftover pastry cream, it makes a perfect filling for a batch of Boston Cream Pie Cupcakes. (recipe coming next week :)

blueberrytart01

Blueberry Tart
makes pastry enough for two 9″ tarts;
pastry cream and berries are enough for one 9″ tart, eight servings

For Cream Cheese Pastry tart shell:
2 1/4 c. all-purpose flour (I use King Arthur)
2 Tbsp. granulated sugar
finely grated zest of one lemon
1/4 tsp. salt
1 c. cold unsalted butter (2 sticks), cut into 1/4″ pats
6 oz. cold cream cheese, cut into small cubes
10″ tart pan with removable bottom

In a food processor, combine the flour, sugar, lemon zest, and salt and pulse a few times to blend. Scatter the butter over the dry ingredients and process until reduced to fine, buttery sand. Scatter the cream cheese cubes over the top and process until ingredients mix completely and come together in a ball of dough.

Divide dough in half and form into two discs, then wrap each disc in plastic wrap and chill for at least four hours, up to three days, before using. (If making only one tart, double-wrap unused portion and freeze up to one month. Thaw overnight before using, then proceed as usual.)

When ready to use, let dough sit at room temperature for fifteen minutes, then roll out between two pieces of parchment paper until it forms a 12″-diameter circle that is 1/4″ thick. Carefully place into a 10″ tart pan and trim away excess dough. (Quick tip: to easily remove extra dough, simply roll the rolling pin across the top rim of the tart pan.) Prick the bottom of the crust with a toothpick every few inches to allow steam to escape and keep your pastry from bubbling up while it bakes. Freeze the tart shell for twenty minutes before baking. (This solidifies the butter and cream cheese again and produces a flakier, more tender cooked pastry.)

Oven 350F. Bake the tart shell for 20-25 minutes, until edges and bottom are light golden brown. The crust will shrink quite a bit, hence the finished 9″ size, but this shrinking makes removing the tart shell from the pan a breeze. Allow tart shell to cool completely, then remove from pan, place on desired serving platter, and set aside until ready to fill. This can be done the day before, but be sure to wrap the cooled pastry well while it sits.

blueberrytart02

For White Chocolate Pastry Cream:
1 1/2 c. milk
1/3 c. granulated sugar
1/4 tsp. salt
1 tsp. vanilla bean paste or real vanilla extract, or the seeds of 1/2 a vanilla bean (for more about vanilla bean paste, see these recipe notes)
2 Tbsp. cornstarch
1 1/2 tsp. all-purpose flour
2 large egg yolks (check the bottom of this earlier post for something to do with those leftover whites)
2 Tbsp. unsalted butter, cut into cubes
1/2 c. white chocolate chips or 3 oz. white chocolate bar, chopped
1/2 c. heavy whipping cream, whipped to soft peaks

In medium saucepan, stir together one cup of the milk, the sugar, salt, and the vanilla bean paste or vanilla bean seeds. (If using vanilla extract, wait to add until just before refrigerating the hot custard.) Bring the mixture to a boil over medium heat.

Meanwhile, whisk together the remaining 1/2 c. milk, cornstarch, flour, and egg yolks in a small glass bowl or measuring cup. Transfer a 1/2 cup of the boiling milk mixture into the egg yolk mixture and whisk until combined. (This step changes the temperature of the eggs slowly so that you don’t wind up with white chocolate scrambled eggs.) Pour the tempered egg mixture into the boiling milk and stir thoroughly. Bring back to the boil and cook for 30 seconds until thickened.

Immediately remove from heat and pour through fine wire mesh strainer positioned over large mixing bowl; this step removes any remaining cornstarch or flour lumps. You will need to help the last of the custard through the strainer by pushing on it with a silicone spatula or the back of a spoon. Be sure to scrape the underside of the strainer too, so you don’t lose any of that yumminess. :)

Stir the butter and white chocolate into the hot custard until it is all melted and thoroughly combined. Rub a bit of butter over the top of the custard, then cover well with plastic wrap, pressing the plastic down on to the surface of the custard so that no skin forms as it cools. (The butter will keep the plastic wrap from sticking.) Refrigerate until cold, at least four hours. Once cooled, gently fold in the 1/2 cup of whipped cream and refrigerate again, tightly covered, until ready for use. Pastry cream will keep up to a week.

blueberrytart03

To assemble:
2 cups fresh blueberries, washed and picked through to remove stems
2 Tbsp. apricot jelly
pastry shell
pastry cream

Spread a generous layer of pastry cream in the bottom of the tart shell, about 1/2″ deep. Scatter blueberries over surface of pastry cream in an even layer. (I favor a more rustic and arbitrary arrangement, but feel free to place them in precise concentric circles. Whatever floats your boat, captain!)

Place apricot jelly in a small bowl and microwave until melted. Brush on surface of berries with a pastry brush to produce a shiny glaze. You won’t taste the jelly at all, it’s just there to be pretty. Chill until served. (I meant the tart, but this could also apply to the cook. You’ve earned it.)

blueberrytart04

P.S. — If you’ve read this far, you get a gold star! This is my longest recipe post by far, but I promise it’s worth it. ;)

Recipe Variations/Notes:
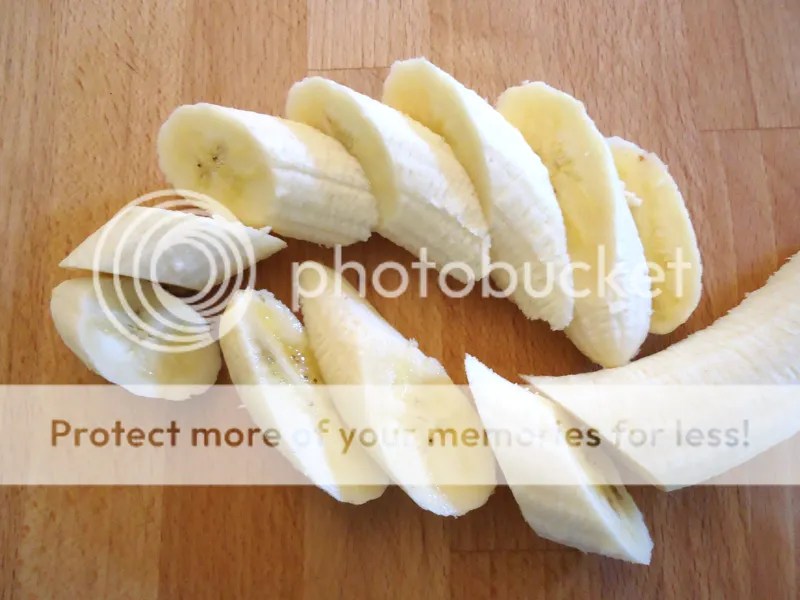
If you’re not a blueberry fan or they aren’t in season, try a Banana Butterscotch Tart instead. Simply substitute butterscotch chips for the white chocolate in the pastry cream, and sliced bananas for the blueberries. Omit the apricot jelly glaze and drizzle a little caramel over the top instead.

The Cream Cheese Pastry recipe above comes from Flo Braker’s fantastic book, Baking for All Occasions: A Treasury of Recipes for Everyday Celebrations. It is firmly ensconced as one of my favorite baking cookbooks of all time, and I highly recommend it. Not only is it full of inspired, yummy recipes written with detailed directions, you can just tell the author truly loves to bake, and that matters to me. As Braker suggests, this pastry makes a lovely crust for a savory pot pie or tart (like this one); simply omit the sugar and lemon zest and proceed as directed.

brakerbaking

(Chronicle Books: 2008; ISBN 978-0811845472)

← Older posts
Follow created for joy on WordPress.com

Enter your email address to follow this blog and receive notifications of new posts by email.

Search

Recent Posts

  • Almond Butter and Jam Cookie Sandwiches
  • Bacon and Egg Breakfast Muffins
  • Loving the Kitchen
  • Creamy Chicken Noodles
  • Double Chip Molasses Oatmeal Cookies

Categories

  • Cook (48)
  • Easy-Peasy (3)
  • Make (37)
  • Read (24)
  • Think (20)

Archives

  • October 2013 (1)
  • March 2013 (1)
  • October 2012 (1)
  • August 2012 (6)
  • July 2012 (4)
  • June 2012 (7)
  • May 2012 (4)
  • April 2012 (6)
  • March 2012 (6)
  • February 2012 (9)
  • January 2012 (14)
  • December 2011 (15)
  • November 2011 (17)
  • October 2011 (6)

All original content © Spring Barnickle, Create Joy LLC, & createdforjoy.com, 2011-2014.

Feel free to link to createdforjoy.com or provide excerpts with clear credit and directions to original content; please ask before copying posts or pictures to your site or publication.

Create a free website or blog at WordPress.com.

Privacy & Cookies: This site uses cookies. By continuing to use this website, you agree to their use.
To find out more, including how to control cookies, see here: Cookie Policy
  • Follow Following
    • created for joy
    • Join 96 other followers
    • Already have a WordPress.com account? Log in now.
    • created for joy
    • Customize
    • Follow Following
    • Sign up
    • Log in
    • Report this content
    • View site in Reader
    • Manage subscriptions
    • Collapse this bar