Tags
apple, apple butter, canning, caramel, cinnamon, clove, cook, gift, Mother's Day, nutmeg, Pink Lady, preserve, read, recipe, spice

Making apple butter has become a fun Mother’s Day tradition for me, a yummy homemade gift to share not only with Mom, but also with several close friends who consistently bless me in my own beautiful, complicated parenting journey. This year I decided to spice things up a little bit by making a variation of one of my all-time favorite flavors, caramel apple.
The inspiration for this recipe came from one in Paul Virant’s fantastic cookbook, The Preservation Kitchen. His Caramel Apple Jam is a savory shredded apple preserve, flavored with thyme and black pepper, but it begins the same way: by making a deep amber, intensely apple caramel. There we parted ways, as I added chopped apples, cinnamon, clove, and nutmeg, then reduced and blended the mixture into tangy, sweet fruit butter.
Caramel Apple Butter contains the same amount of sugar and apple juice as traditional apple butter, but the caramelization process brings out the warmth of both. The results are thick and velvety, equally at home slathered on a ginger scone or a grilled turkey and cheese sandwich. I love apple butter on pancakes or cheddar biscuits, and it makes a beautiful sauce for roasted pork loin when added to the pan juices with a bit of grainy mustard.
A note: this cooking process is not one that lends itself to multi-tasking; although not complex, it requires some time and attention. Because making caramel involves hot sugar, this also isn’t a good time to invite little ones into the kitchen. Canning preserves is an ideal late Sunday afternoon activity, just right for when the house is quiet, everyone is absorbed in their own tasks, and the kitchen is otherwise empty. I love this hour of productive peace, with nothing more urgent to do than stir caramel and enjoy the fragrance of warm apples. Because I am a kitchen romantic, I also like to think that a little of my calm and focus seeps into what I am cooking, and what mom couldn’t use more of those?

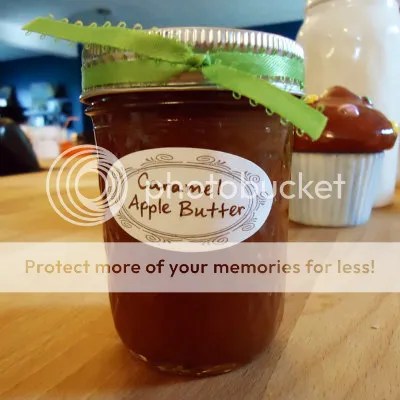
Caramel Apple Butter
makes 8 calm and focused half-pint jars
12 sweet-tart apples, preferably Pink Lady, peeled, cored, and chopped into 1/2″ chunks (can substitute Cripp’s Pink, Honeycrisp, Ambrosia, or Fuji apples)
2 1/2 c. granulated sugar
2 Tbsp. water
4 c. whole-pressed, unsweetened apple juice or cider (I like Simply Apple or Mott’s Natural)
1 tsp. kosher or coarse sea salt or 1/2 tsp. fine salt
2 tsp. ground cinnamon
1/2 tsp. ground cloves
1/4 tsp. freshly ground nutmeg
8 half-pint jars with metal bands and rubber-sealed lids (like these)
canning supplies as specified in recipe, including pan, tongs, and funnel
Use a large, deep, wide-bottomed pan, preferably with rounded sides. Stir together sugar and water until sugar resembles wet sand, then cook over medium-high heat until sugar begins to melt, about 6-8 minutes. Do not stir or swirl pan during this stage, just watch. (Movement will cause the sugar to crystallize further and make big lumps. Trust me on this one: don’t leave the kitchen because it’s important you start stirring as soon as it begins to melt, but be your best, most patient self until then and don’t touch! :)
The sugar will turn crispy and crackly, then finally begin to ooze into a pale brown syrup at the edges. Once this happens, begin stirring with a wooden spoon, and continue to stir as the sugar melts completely. Once all the granules are dissolved, allow sugar to caramelize another 5-7 minutes, until it’s deep, dark amber in color and smells rich and nutty. Do not taste or touch it, as hot sugar burns are very painful.
Once the sugar is caramelized, remove it from the heat and stand back a bit as you pour in the apple juice. Once your caramel geyser quits bubbling and frothing enough to safely approach, return it to the heat and stir. The caramel will have crystallized into a solid lump in the bottom of the pan, but patient stirring will help it dissolve again. Continue stirring constantly as the apple juice caramel simmers and reduces by half, about fifteen minutes. Add the salt and ground spices and stir another minute or two to thoroughly combine.
Once the spiced apple caramel has thickened, it’s time to add the fruit. (Quick tip: For practicality’s sake, I often peel, core, and chop the apples the night before, toss them with the juice of a lemon, and then refrigerate until ready to use.) Stir in the apples and cover until it comes to a boil, then simmer uncovered for 30-40 minutes, until apples are very tender and liquid has further reduced.
While apples are cooking, use a water-bath canning pan to immerse eight half-pint jars in water and heat for ten minutes. (I use a 21 1/2-quart pan and rack, available for less than $20. I also use a set of silicone-lined jar tongs and a wide-mouth funnel, available individually or as part of a set.) This heats the jars enough that the hot apple butter won’t crack the glass.
When the apples are finished cooking/reducing, turn off the heat, and use an immersion blender on its highest setting to process the preserves until completely smooth. (As I explain in these recipe notes, I love my inexpensive immersion blender. If you don’t have one, you can process your apple butter in batches in a traditional blender.)
Once blended smooth, use a funnel to fill heated, dried jars, leaving 1/2″ of space at the top of each jar. Screw on the bands and lids, then process your jars by immersing in boiling water bath for ten minutes. Remove the sealed, processed jars to allow them to cool. When the lids make a popping sound, you know they’re sealed tight. Unopened jars of apple butter can be stored at room temperature for up to six months, but they should be refrigerated after opening. If a jar doesn’t seal after processing and cooling, the apple butter is fine, but it should only be kept in the refrigerator.
P.S. — If you want a little more apple butter inspiration, check out my recipe for Apple Butter Cupcakes with Caramel Frosting. Yum! :)