• Make
  • Cook
  • Read
  • Think
  • My Story

created for joy

~ make today

created for joy

Tag Archives: butter

Butterscotch Banana Sundaes

24 Tuesday Jul 2012

Posted by createdforjoy in Cook

≈ Leave a comment

Tags

banana, bananas foster, butter, butterscotch, cook, gluten-free, ice cream, nostalgia, recipe, sulfite-free, sundae

butterscotchsundae

I was six years old when my love affair with butterscotch began. My grandmother always had a stash of mixed hard candy in the bottom of her purse, and whenever she took me bowling, she would let me dig through her big burgundy handbag in search of cellophane-wrapped goodies. I didn’t mind the occasional peppermint because they reminded me of Christmas, and I insisted on trying to eat the red-hot cinnamon discs, even though they burned my tongue. But the real objects of my affection were little butterscotch rounds, salty and sweet, wrapped in gold and equally treasured.

Fast-forward thirty years, and these sundaes are my ode to butterscotch in all its gooey, buttery glory. The star of the show is homemade butterscotch sauce, spooned over the ice cream and used to make a shortcut version of Bananas Foster to put on top. A handful of crushed salted almonds is all it needs to be positively swoon-worthy.

Butterscotch Banana Sundaes

To make one pint Butterscotch Sauce:
1/2 c. best quality unsalted butter (8 Tbsp. or one stick; I like Cabot Creamery)
2 Tbsp. golden syrup (see these recipe notes for more info; can substitute light corn syrup)
1/4 c. water
3/4 c. granulated sugar
1/4 c. demerara or light brown sugar (I use demerara to stay sulfite-free)
1/2 tsp. salt
1/3 c. heavy cream
1 tsp. vanilla bean paste or real vanilla extract
1/2 tsp. fresh lemon juice

Heat the butter, golden syrup, and water in a medium saucepan over medium heat, stirring until the butter melts completely. Stir in both kinds of sugar and the salt and bring mixture to a boil. Cook until the sauce reaches 245F and turns pale brown, about 7-8 minutes. Remove from heat and carefully stir in heavy cream until completely incorporated. Add vanilla and lemon juice and stir again, then pour into a glass jar and allow to cool. This keeps at room temperature for several days, or it can be stored in the refrigerator for up to two months; simply reheat in microwave before using.
butterscotchsundae

To make four Butterscotch Banana Sundaes:
1/2 c. homemade butterscotch sauce
2 large bananas
1/4 tsp. ground cinnamon
pinch salt
1/2 tsp. fresh lemon juice
2 c. ice cream, preferably all-natural (my favorite flavors with this are vanilla, butter almond, or coffee)
2 Tbsp. crushed salted almonds

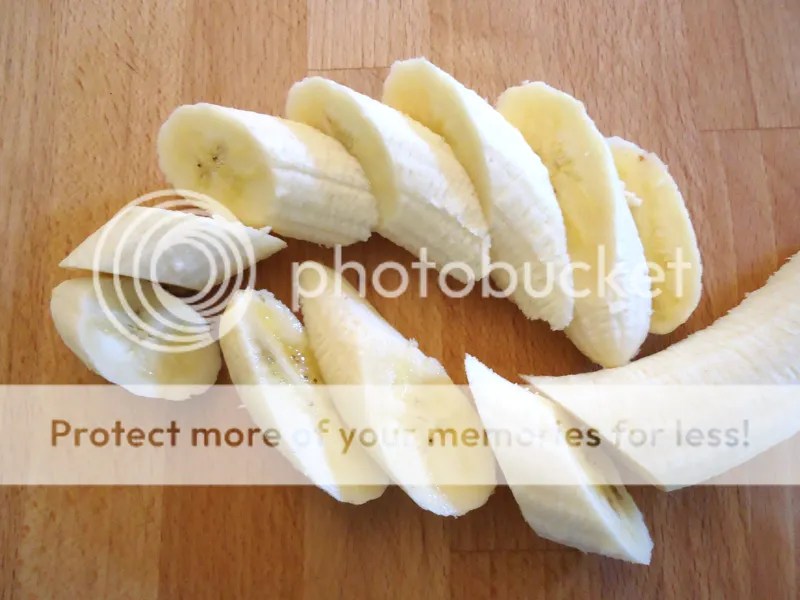
Cut bananas into 1/2″-thick chunks. (I like to slice mine on the bias because I’m fancy like that. ;) In a small sauté pan, stir together 1/4 c. butterscotch sauce, cinnamon, salt, and lemon juice. Heat over medium-low until sauce begins to thin, then add sliced bananas. Cook, stirring occasionally, until bananas soften and start to look blurry around the edges, 2-3 minutes. Remover from heat and set aside until bananas are warm but not hot, so it doesn’t make a complete puddle of your ice cream.

When ready to serve, scoop 1/2 cup of ice cream into each of four small bowls. Spoon one tablespoon plain butterscotch sauce over the top of each serving, then top each sundae with 1/4 of the cooked butterscotch bananas and the warm sauce from the pan. Sprinkle 1/2 tablespoon of almonds over each serving, add a spoon, and enjoy.

Recipe Notes:
My butterscotch sauce recipe is adapted from one in the March 2008 issue of Saveur magazine. Saveur is one of my favorite food magazines, and this recipe came from one of my favorite special issues, entitled “The Beauty of Butter.” My sentiments exactly. ;)

butterscotchsundae

Advertisement

Vanilla Peach Butter

11 Wednesday Jul 2012

Posted by createdforjoy in Cook

≈ Leave a comment

Tags

biscuits, bread, butter, canning, cobbler, cook, cream cheese, fruit, ginger, jam, peach, preserve, scones, spread, vanilla, vanilla bean

peachbutter

Peaches are one of my favorite fruits, and they are in season here in the southern U.S., ripe and plentiful. When our local market had a spectacular one-day sale on them, guess who came home with a case? Eighty plump, juicy little beauties, to be blanched, peeled, pitted, and chopped, then transformed into double batches of Spiced Peach Chutney and Vanilla Peach Butter.

Unlike more labor-intensive chutney, peach butter contains very few ingredients. And have no fear, you don’t need a crate full of fruit to make this recipe; in fact, it only requires twelve cups, or about 4-1/2 pounds. The result is a spoonable preserve, packed with sweet, tangy flavor. The addition of vanilla bean and ginger result in a scent and taste much like peach cobbler, minus all that pesky pastry work.

Vanilla Peach Butter would be beautiful swirled into a coffee cake, and it is destined to be best friends with Ginger Scones. However, so far, we have finished off an entire jar by spooning it on to chunks of whole wheat bread spread thick with cream cheese, or heaping it on to plain biscuits. Sometimes, the simplest ways are the best. :)

peachbutter

Vanilla Peach Butter
makes six half-pint jars

12 c. peeled and chopped peaches (see recipe notes for quick peeling technique)
2 c. granulated sugar
juice and zest of a lemon
2″-piece of fresh ginger, peeled and grated
2 vanilla beans or 1 Tbsp. vanilla bean paste

six half-pint glass jars with bands and lids
probe cooking or candy-making thermometer
canning supplies as specified in recipe, including pan, tongs, and wide-mouth funnel
immersion or traditional blender (see these recipe notes for more about immersion blenders)

In a large, wide-bottomed pot over high heat, combine peaches, sugar, lemon juice and zest, and grated ginger. If using whole vanilla beans, split them length-wise with a sharp paring knife, and add them now. Bring fruit mixture to a boil and cook for 10-12 minutes, until peaches soften and release their juices and vanilla beans empty their seeds. Remove from heat, cool, and then refrigerate overnight, or up to three days. (If using vanilla bean paste, stir it into the peaches before refrigerating.) This rest period gives time for the vanilla and ginger flavor to develop and infuse the peaches.

If you used whole vanilla beans, remove the pods now. Puree peach mixture until no chunks remain, either by blending in traditional blender, or returning peaches to large, wide-bottomed pot and using an immersion blender. Turn on medium-high heat, attach cooking thermometer, and simmer gently until fruit reaches 215F, stirring occasionally. The mixture should have thickened and reduced by about half. (Watch the heat, as fruit butters scorch easily.)

If you’ve made my recipe for Caramel Apple Butter, this routine is exactly the same. (For canning, I use a 21 1/2-quart water-bath canning pan and rack, available for less than $20. I also use a set of silicone-lined jar tongs and a wide-mouth funnel, available individually or as part of a set.) While the peach butter reduces, use the water-bath canning pan to immerse six half-pint jars in water and heat for ten minutes. This heats the jars enough that the hot peach butter won’t crack the glass. Remove them and place upside-down on a clean dish towel to dry. Just before filling the jars, dip the lids and bands in the water long enough to soften the adhesive — less than a minute will do it.

Once the peach butter reaches 215F and is reduced by half, use a wide-mouth funnel to fill the heated, dried jars, leaving 1/2″ of space at the top of each jar. Screw on the bands and lids, then process your jars by immersing in boiling water bath for ten minutes. Remove the sealed, processed jars to allow them to cool. When the lids make a popping sound, you know they’re sealed tight. Unopened jars of peach butter can be stored at room temperature for up to six months, but they should be refrigerated after opening. If a jar doesn’t seal after processing and cooling, the peach butter is fine, but it should only be kept in the refrigerator.

peachbutter

Recipe Notes:
To quickly peel your peaches without losing any fruit or juice, the easy answer is blanching. Blanching is the process of briefly dipping fruit or vegetables into boiling water, then immediately immersing in ice water. The application of heat and cold loosens the skins so they are easily removed. And if your peaches are less than ripe, an extra minute in the boiling water can help sweeten and soften them.

To blanch your peaches, first use a paring knife to slice an “x” in the bottom of each peach. Bring a large pot of water to the boil, and immerse peaches in water for one minute. Remove the fruit to a large bowl of ice water and allow to soak another minute or two. The peach skin will be loose and easily peeled from the fruit. (So easily in fact, that young children can do it. Never turn down willing help in the kitchen. ;)

One last note regarding peach butter vs. peach jam: the primary difference between fruit butters and jam or preserves is the amount of sugar and the addition of pectin. Fruit butter contains a fraction of the sugar of jam and no added pectin to thicken it. The result is a preserve that is more suited to spooning than spreading, but one that maintains more pure, concentrated fruit flavor and less added sugar. While not the case with all fruits, I prefer peach butter to peach jam every time because I can still detect the true taste and texture of the ripe fruit.

Birthday Shortbread

30 Wednesday May 2012

Posted by createdforjoy in Cook

≈ 2 Comments

Tags

British, butter, caramel, chocolate, cook, cookie, cookie bars, dessert, dulce de leche, millionaire's shortbread

bdayshortbread04

When I lived in England, one of my favorite desserts was Millionaire’s Shortbread, a bakery treat made of sweet sedimentary layers of cookie, caramel, and chocolate. These cookie bars are, in a word, dreamy — the kind of dessert that requires you close your eyes for a moment after you take a bite.

They start with a tender shortbread base that is everything a cookie by that name should be: buttery, crumbly, and deceptively simple. Shortbread is one of the culinary miracles that first drew me to baking, and it still thrills me to see flour, sugar, butter, and a pinch of salt transformed into something so special. With the help of a food processor, this version comes together in less than five minutes, and that takes into account some dawdling while you measure.

While the cookie base bakes, you have the pleasure of meeting the British cousin of dulce de leche, a thick, milky caramel the color of pale butterscotch. It is just as simple to put together as the shortbread, and never have ten minutes’ stirring been so well-rewarded. Of course, a recipe called Millionaire’s Shortbread has to be over the top, and a layer of silky chocolate ganache takes it there in style. Despite its rich name and taste, Millionaire’s Shortbread has only six ingredients total. Of course, after the first bite, it’s also obvious that there’s butter in every layer. ;)

In deference to its British provenance, I am providing the recipe measurements in both volume and metric weight. I do actually pull out my little electric kitchen scale to make this one, if only because fiddling with buttons and using the word “tare” pleases me. It will turn out deliciously either way, so use whichever version you prefer. And one last note: in my house, this is now known as Birthday Shortbread because the son of a dear friend asked if he could have this recipe as his sixteenth birthday present. What better recommendation could you ask for, really? A dessert fit for millionaires and distinguishing teenagers alike.

bdayshortbread02

Birthday Shortbread
makes twenty-seven 1″x3″ bars

For cookie:
1 3/4 c. (225 grams) all-purpose flour (I use King Arthur)
1/4 c. (50 grams) granulated sugar
3/4 c. (170 grams or 1 1/2 sticks) cold unsalted butter, cut into 1/2″ pieces
pinch of salt

For caramel:
14 oz. can (400 grams) sweetened condensed milk
1/2 c. (115 grams or 1 stick) unsalted butter
1/2 c. (100 grams) granulated sugar
pinch of salt

For chocolate:
6 oz. (170 grams) semisweet chocolate chips or finely chopped chocolate bar
1/4 c. (55 grams or 1/2 stick) unsalted butter
pinch salt

Oven 350F. Start by making the shortbread base: in a food processor, combine flour and sugar and pulse a few times to mix. Add butter pieces and process until uniformly mixed into buttery sand. Pour crumbs in 9″x13″ pan or glass baking dish, spread evenly, and press down until crumbs stick together to form dough. (Quick tip: to be sure it’s tightly packed and you have a nice, flat base, cover the surface of the dough with a piece of plastic wrap and press down firmly with the bottom of a measuring cup.) Bake shortbread for 20-25 minutes, until pale golden brown at edges.

While shortbread cools, prepare caramel filling. In medium saucepan, combine milk, sugar, butter, and salt over medium heat. Stir occasionally to blend ingredients until mixture comes to a boil. Reduce heat to low and simmer, stirring constantly. Cook 10 minutes, until caramel has thickened into a pale golden custard, then pour over cooked shortbread base. Spread with silicone spatula so filling evenly covers cookie and allow to cool to room temperature, at least two hours.

When base and filling are cool, make chocolate topping. In microwave-safe bowl, cook chocolate, butter, and salt until melted and glossy, stirring every 30 seconds to prevent scorching. Spread evenly over cookie bars and allow to cool at least 30 minutes, longer as desired. Cut with a sharp paring knife into nine rows and three columns, for a total of twenty-seven 1″x3″ bars. (Quick tip: to keep your bars neater, dip blade of knife into piping hot water and dry it off between each cut.)

Store leftovers tightly wrapped at room temperature. This recipe is simplicity itself, and my 12-year-old can make it without assistance. This may or may not count as a good thing in your book, depending on your self-control level; regardless, it’s good to have up your sleeve when you want to bake something fantastic without venturing to the grocery store or thinking very hard. :)

bdayshortbread01

Ginger Scones and Two-Step Raspberry Jam

26 Thursday Apr 2012

Posted by createdforjoy in Cook

≈ Leave a comment

Tags

bake, butter, cook, cream, crystallized ginger, demerara, jam, quick, raspberry, scones, tea, vanilla sugar

gingerscone01

April offered up its last rebellious plunge into winter temperatures last week, the ideal time for a hot pot of tea and a batch of scones fresh from the oven. The routine of stirring and shaping, rolling and cutting is a comfort to me when the sky is gray and staying inside seems like a very good idea indeed. Like all good scones, these are plump and dimpled, with toasty brown tops and feather-light interiors. They get an extra bit of sweet heat from spicy crystallized ginger, just enough zing to keep them lively. I finish them with a bit of scone nirvana: a generous dollop of lightly whipped cream and a spoonful of jewel-tone raspberry jam.

I never lack the desire to make jam, but I often lack the patience. With a tray of scones baking and a pint of fragrant organic raspberries sitting on the counter, now is not the time for mason jars and pressure canners. This calls for a quick mash and stir, puddles of scarlet fruit and syrup: instant jam gratification. I am sure there are purists in both baking and preserving camps alike who would cry foul at the notion of a scone so messy that it requires a fork. I say, try it in all its melting, buttery, tangy-sweet glory, and then tell me you don’t want another. :)

gingerscone04

Ginger Scones and Two-Step Raspberry Jam
makes about 18 scones and a cup of jam

For scones:
3 3 /4 c. all-purpose flour (I use King Arthur)
1/4 tsp. salt
1/4 c. granulated sugar
3 Tbsp. baking powder
1/2 c. cold unsalted butter (1 stick), cut into small pieces
1/4 c. chopped crystallized ginger or ginger baking bits
1 1/4 c. milk
2 Tbsp. heavy cream or milk to brush on tops of scones and
1 Tbsp. demerara sugar for sprinkling

For jam:
1 pint fresh raspberries, preferably organic
1/3 c. granulated sugar or vanilla sugar (see these recipe notes for vanilla sugar how-to; taste your berries for sweetness and feel free to adjust the amount of sugar)

Oven 375F. In a large mixing bowl, whisk together the flour, salt, granulated sugar, and baking powder until well-combined. Using your hands, press and rub the cold butter into the dry ingredients until the mixture is uniform and transformed into sandy, crumbly bits of dough. Mix in the ginger, then add the milk and stir with a wooden spoon just until combined.

Turn the dough on to a lightly floured surface and knead 10-12 times to finish bringing it together. Press and shape into a disc about an inch thick and cut out scones with a 2-1/2″-diameter round cookie cutter or glass. Gently press the scraps together and cut again until all the dough is used. (A light hand is key here, or over-working the gluten in the flour will make the final scones tougher.) Place the scones on a lightly greased or parchment-lined cookie sheet. Brush the tops with cream and sprinkle with demerara sugar, then bake 15-20 minutes. Tops should be light golden brown, but still tender.

While the scones cook, make your jam. Two steps, as promised: mash the raspberries and sugar together in a small saucepan, then simmer over medium-low heat for 10-15 minutes. Your jam should still have bits of whole berry, and the liquid should be thick and syrupy. This is the sort of jam you apply with a spoon, not a knife.

In addition to jam, I like lightly whipped cream with mine, but you could also use a drizzle of creme fraiche or even a spoonful of double-thick clotted cream, if you’re lucky enough to have it. (I miss you, Devonshire!)

This scone recipe is adapted from one in Gale Gand’s cookbook Brunch!, as mentioned in the Pear and Marzipan Pastries post.

gingerscone02

Ottolenghi’s Green Pancakes with Lime Butter

15 Wednesday Feb 2012

Posted by createdforjoy in Cook, Read

≈ Leave a comment

Tags

butter, cook, green, lime, Ottolenghi, pancakes, recipe, vegetarian

pancakes01

I have seldom posted a recipe that wasn’t my own on this blog, but I am making an exception. I feel comfortable doing so because A) this recipe already appeared in print in the London Times in 2008; and B) I am posting it entirely to encourage you to buy the author’s cookbook, Plenty. Plenty is the culinary brainchild of London restaurant owner Yotam Ottolenghi, and the considerable press buzz surrounding it is absolutely merited.

Mr. Ottolenghi is Israeli, and his dishes are Med-Rim in flavor, drawing from the culinary heritage of northern Africa, the Mediterranean Middle East, and southern Europe. The recipes are vibrant and modern, sometimes complex but never fussy. Plenty happens to be a vegetarian cookbook, although its author and his eponymous restaurant are not. But this is not the meager, stretched-thin sort of food that outsiders often associate with their herbivorous brethren; instead it is filling, tasty, and somehow indulgent. The recipes can be a meal themselves or co-exist happily alongside meat; Monday night, we sampled Sweet Potato Wedges with Lemongrass Creme Fraiche, and they made a brilliant partner to smoked turkey breast and peppery greens.

I served Plenty‘s Green Pancakes with Lime Butter as part of the spread at our Super Bowl bash, and they were delicious. The original recipe calls only for spinach, but I substituted Organic Girl’s Super Greens, a mix of baby greens that includes red and green chard, spinach, arugula, and tat soi. I also chose to use one large, milder Anaheim pepper instead of two smaller green chiles to control the heat, since I knew some of our guests were not fans of spicy food. Other than that, I stuck stolidly to the recipe and was completely satisfied with the results. These are easily made ahead and warmed just before serving, and the lime butter is equally brilliant over other veggies and fish or chicken. Make this recipe, love it, and then buy the cookbook. :)

Photobucket

Ottolenghi’s Green Pancakes with Lime Butter
makes a dozen 3″-pancakes, serves 3-4

For pancakes:
8 oz. (about 8 cups) raw spinach or mixed greens, washed
3/4 c. self-rising flour (see Recipe Notes below to make your own)
1 Tbsp. baking powder
1 egg
4 Tbsp. unsalted butter, melted
1/2 tsp. kosher or coarse sea salt
1 tsp. ground cumin
2/3 c. milk
6 medium green onions, finely sliced
2 fresh green chiles, thinly sliced
1 egg white
olive oil for frying

For lime butter:
8 Tbsp. unsalted butter (one stick), at room temperature
grated zest of one lime
1 1/2 Tbsp. fresh lime juice (that was the juice of one lime in my case)
1/4 tsp. salt
1/2 tsp. white pepper
1 Tbsp. chopped cilantro
1/2 clove garlic, finely chopped
1/4 tsp. chile flakes

To make the lime butter, beat butter in small mixing bowl with wooden spoon until soft and creamy. Add rest of butter ingredients and mix well. Tip on to a sheet of plastic wrap or parchment and roll into a sausage shape, then chill until firm.

Wilt the spinach in a saute pan with a splash of water over medium heat. (If using mixed greens, wilting will take a couple minutes more.) Drain in a sieve, and when cool, squeeze hard with your hands to remove as much moisture as possible. Roughly chop and set aside.

Put the flour, baking powder, whole egg, melted butter, salt, cumin, and milk in a large mixing bowl and whisk until smooth. Add the green onions, green chiles, and chopped spinach, and mix well with a fork. Whisk the egg white in a small bowl until it holds stiff peaks, then gently fold into the pancake batter with a silicone spatula.

Heat about a tablespoon of oil in a skillet over medium-high heat. For each pancake, ladle in two tablespoons of batter and press down gently. Cook for about two minutes on each side, until golden brown and green. Transfer to paper towels, and continue cooking until all batter is used; you should have about twelve 3″-wide pancakes. To serve, pile up three warm pancakes for each guest and top with a slice of lime butter to melt over the top.

Recipe Notes + Tips:

If you don’t have self-rising flour on hand, mix one cup all-purpose flour, 1-1/4 tsp. baking powder, and a pinch of salt. I place my ingredients straight into a zip-close bag so they are easily mixed and stored. This recipe requires only 3/4 cup of self-rising flour, so you’ll have a little left over for your next recipe.

pancakes02

Vanilla Bean Butterballs with Chocolate Ganache

12 Monday Dec 2011

Posted by createdforjoy in Cook

≈ Leave a comment

Tags

butter, butterballs, chocolate, cook, cookies, ganache, holiday baking, shortbread, vanilla, vanilla sugar

butterballs3

It takes a lot to trump the perfect chocolate chip cookie, but these just might do it. Little nuggets of soft, buttery shortbread sandwiched around creamy chocolate, covered in the warm, sweet crunch of vanilla sugar… forget sugarplums, I’ve got visions of butterballs dancing in my head. ;)

A pile of these make a delicious gift, whether birthday, holiday, or hostess. And although they are sugar-coated show-stoppers, the recipe is actually quite simple — only seven ingredients and a bit of planning involved. My fourteen-year-old just made his first solo batch for a local cookie contest (he won), and he seconds my infatuation. Can cookies sparkle? I think these might…

butterballs2

Vanilla Bean Butterballs with Chocolate Ganache
makes 18 sandwich cookies

For shortbread:
1 c. unsalted butter, softened (2 sticks)
1/2 c. granulated sugar
1 3/4 c. all-purpose flour
3/4 tsp. salt (not coarse)
1 tsp. vanilla bean paste or real vanilla extract
about 2 c. vanilla sugar for rolling (see Recipe Notes below)

For chocolate ganache filling:
4 oz. quality semi-sweet chocolate (I like Ghiradelli or Scharffen Berger)
1/3 c. heavy cream
1/4 tsp. salt (not coarse)

With the whisk of an electric mixer, beat the butter until soft and fluffy, about three minutes. Add granulated sugar, salt, and vanilla, and mix again until well-blended. Stir in the flour by hand until it forms a soft dough. Shape dough into a disc, wrap in plastic, and chill for at least 3 hours, up to a week.

Working with well-chilled dough, break off teaspoon-size piece and roll into 36 balls about 3/4″ across. (Making them uniform in size is more important than their exact diameter.) Place balls on wax/parchment-paper lined plate and freeze for 30 minutes. While they are in the freezer, make the chocolate ganache for the filling.

Place chocolate, cream, and salt in small pan over medium heat, stirring. Remove from heat as soon as chocolate melts and combines with cream into a glossy mixture. Transfer ganache to a bowl and refrigerate until the consistency of thick pudding. (It needs to be stiff enough to hold your cookie sandwiches together.)

Preheat oven to 375F. Place balls of chilled dough about two inches apart on cookie sheets and bake 10-12 minutes. Cook just until set but not browned. While cookies cool on baking sheets, place vanilla sugar in a shallow bowl for rolling. To assemble, put a smear of ganache on the flat bottom of one cookie, then place another on top. Roll in vanilla sugar until well-coated. I refrigerate mine for at least a half hour afterwards to be sure they are well-stuck, but they can be stored at room temperature after that. (You can also sandwich these with raspberry jam, but the exclusion of chocolate from a recipe is frowned upon by my household…)

Recipe Notes + Tips:
Although you can certainly roll these in plain sugar, I love the added flavor and scent that comes from using vanilla sugar. To make your own, just slice a vanilla bean length-wise and add it to four cups of granulated sugar in an airtight container; wait two or three weeks before using, and whenever you think about it, shake the container to evenly distribute the vanilla. As you use it, add more plain sugar to the container to maintain your supply.

Vanilla sugar is a fantastic addition to your pantry, and there’s no end to its uses: add a teaspoon to your morning tea or coffee; sprinkle it over oatmeal or cream of wheat; give plain yogurt a flavor-boost or blend it into your favorite smoothie; add depth to baked goods from blueberry muffins to lemon bars to apple pie; make a jar of vanilla-cinnamon sugar to use on snickerdoodles, as a topping on grilled peaches, or to caramelize figs… did I mention there’s no end to its uses? :)

butterballs1

This recipe is adapted from one in Gale Gand’s 2006 cookbook Chocolate and Vanilla. As you might guess from the title, half the recipes are chocolate-focused and the other half vanilla, and all of them I’ve tried are delicious. (Clarkson Potter: 2006, ISBN 978-0307238528)

Clementine-Scented Vanilla Caramels

05 Monday Dec 2011

Posted by createdforjoy in Cook

≈ Leave a comment

Tags

butter, candy, caramel, clementine, cook, homemade, patience, sulfite-free, vanilla bean paste

caramels1

Things I learned the hard way:
1. Never put on eye make-up while you have the hiccups.
2. If you promise to have six dozen sugar cookies ready in a few weeks, write that down somewhere.
3. You shouldn’t leave a two-year-old alone with a palette of watercolors, even if you think she can’t possibly reach them.
4. Turns out there is such a thing as too much Worcestershire sauce.
5. There are a LOT of ways to mess up homemade caramel.

I learned that last one this weekend after much sugary carnage. I realize now that the key to exquisite caramel is equal parts butter and patience. As you read through the recipe, you might notice I say “stir constantly while simmering for 45 minutes.” That’s not a typo — I really mean three quarters of an hour. My family graciously took stirring shifts, but a half hour in, my husband declared we were never making homemade caramels again. Fast-forward another half hour to his first taste, and that was quickly revised to, “I’m available to stir anytime.” :) These really are just ridiculously, achingly buttery and tender; sweet without being cloying, with a delicate citrus scent from clementine zest steeped in the cream. I foresee many happy hours of stirring ahead.

caramels2

Clementine-Scented Vanilla Caramels
makes 196 dreamy little bites

2 c. granulated sugar
1 c. turbinado or demerara sugar (can substitute packed light brown sugar)
1 c. golden syrup (read more about golden syrup in my Peanut Butter Hot Fudge Sauce Recipe Notes, can substitute light corn syrup)
1 c. evaporated milk
2 c. heavy cream
1 c. unsalted butter (2 sticks) plus more for baking sheet
2 tsp. vanilla bean paste or real vanilla extract (see Recipe Notes)
zest of six clementines (or 2 oranges if clementines unavailable)
1 tsp. coarse kosher or sea salt
10″ x 15″ baking sheet, at least 1″ deep
heavy-duty aluminum foil (regular-strength foil will stick to caramels)
wax paper
candy thermometer

Thoroughly butter a baking sheet lined with heavy-duty aluminum foil. In a large pot, mix evaporated milk, cream, and clementine zest. Cook on low until barely simmering, then remove from heat. Let mixture sit for 10 minutes more, then strain out zest.

Now add both types of sugar, golden syrup, butter, and salt to the cream in the pot. If you’re using vanilla bean paste, add it now; if using vanilla extract, wait to add it until caramel is finished cooking. (See Recipe Notes to find out why.) Attach your candy thermometer to the side of the pot, being sure the probe does not touch the bottom of the pan. Bring to a boil, then simmer the ingredients over medium-low heat, stirring constantly for approximately 45 minutes, until thermometer reads 248F.

When thermometer reaches 248F, immediately remove pot from heat. (If using vanilla extract, now is the time to add it.) Very carefully pour the hot caramel on to the buttered, foil-lined baking sheet. (The care is to protect you, not the caramel.) Let the caramel sit until cooled, about two hours. Now would be a good time to cut out the 190-ish pieces of wax paper you’ll need to wrap your caramels. For this recipe, cut your paper wrappers about 2 1/2″ x 3 1/2″. Your stirring helpers might also be persuaded to assist here.

Flip the cooled caramel slab out on to a piece of parchment or wax paper and gently remove foil. With a sharp, buttered knife, cut into 14 rows and 14 columns, for a total of 196 little rectangles. Wrap each piece in wax paper and twist the ends to seal. This is another lesson in patience brought to you by homemade caramels, but it’s not as bad as it sounds. I got into a good rhythm and wrapped mine in about an hour. (I also wound up with a half dozen less caramels to wrap, thanks to an innovative self-motivation scheme… ;)

These will keep at room temperature for two weeks easily, but they’ll never last that long.

Recipe Notes + Tips:
This is not the first time I’ve mentioned vanilla bean paste, and I am in love with the stuff. It is another ingredient I discovered by necessity after developing food allergies; since traditional flavor extracts are alcohol-based, they are off limits for those with sulfite allergies. Vanilla bean paste is alcohol-free, which means its flavors do not change with cooking and it’s more palatable in uncooked applications like icing. It has the consistency and sweetness of a thick syrup, and it contains real vanilla beans. It can be used teaspoon for teaspoon in place of vanilla extract, but the paste is much more warm and flavorful and gives your food that beautiful vanilla bean-flecked look. (Feast your eyes on the caramel frosting on these cupcakes.) I use Nielsen-Massey vanilla bean paste, and you can check out their web site for where to buy.

Final caramel words of experience: the caramel will triple in size before boiling back down, so trust me when I say to use a large pot. I know 45 minutes seems like a long time, but the rise in temperature needs to be slow to avoid scorching the sugar, so don’t try to cook it over higher heat to speed up the process. You will notice a steady rise in temperature until about 223F; from then on, the water is boiling out, so the process of achieving the next 25 degrees takes longer than the initial 223 did. (That’s science for you.)

Meyer Lemon Curd

28 Monday Nov 2011

Posted by createdforjoy in Cook

≈ 6 Comments

Tags

butter, cook, dessert, lemon curd, meringue, meyer lemon, pavlova

lemons meyerzest butter
lemoncurd

I don’t think the name “lemon curd” does justice to this rich, buttery custard; it is the perfect blend of velvety sweetness and citrus tang. This time of year, I like to make it with Meyer lemons, a hybrid cross of lemons and oranges that results in a juicier, more flavorful fruit. Lemon curd is a true culinary multi-tasker and can be used as a filling in tarts and cookies or as a topping on ice cream, meringue, or pancakes. A dollop instantly transforms gingerbread or vanilla pound cake. And in the midst of winter, you can’t go wrong with the gift of a bright yellow jar of lemony sunshine.

Meyer Lemon Curd
Makes about 1 3/4 cups

Zest and juice of 3-4 Meyer lemons (can substitute regular lemons if Meyer unavailable),
about 1/2 c. juice and 2 Tbsp. zest
1 c. granulated sugar
1/4 tsp. fine salt
6 large egg yolks
1/2 c. cold unsalted butter (1 stick), cut into tablespoon-size pats

Whisk zest, juice, sugar, salt, and egg yolks in medium saucepan until smooth. Bring to simmer over medium heat, whisking constantly. Continue to whisk and cook 10-12 minutes more until thickened to a custard-like consistency. Strain through a fine sieve into a bowl, then whisk in butter a pat or two at a time, until all butter is melted and incorporated into the thick, glossy curd. Store in a wide-mouth pint mason jar or other airtight container; keeps in refrigerator up to two weeks.

pavlovamain

Since making lemon curd leaves you with a passel of unused egg whites, it only seems logical to make a pavlova, as I did last week for a dear friend’s Thanksgiving birthday. A pavlova is layers of whipped cream, custard or fruit curd, and meringue; in this case, it’s Meyer lemon curd and a vanilla-scented meringue with a crispy exterior and marshmallow-chewy interior. Consider this post a two-fer. :)

Pavlova Meringue
serves 8-10

4 egg whites
1 1/4 c. granulated sugar
2 tsp. vanilla bean paste or real vanilla extract

Preheat oven 300F. Place egg whites and sugar in bowl of electric mixer and mix on highest speed until glossy white and forming stiff peaks (about 5 minutes). It may be slightly grainy, but if you see lots of undissolved sugar, continue whisking until more incorporated. Add vanilla and whisk until thoroughly combined.

Spread the meringue on a parchment-lined baking sheet using a silicon spatula. I try for an oval, but part of pavlova’s charm is its imprecision. Bake the meringue for about 1 hour, until an even pale brown with the beginning of cracks around the edges. (It will crack a bit more while it cools — that’s okay.)

To serve, break off a wedge of completely cooled meringue and layer on a tablespoon or two of lemon curd and a generous spoonful of lightly sweetened whipped cream. (I like 1 c. heavy cream + 1 Tbsp. vanilla sugar or regular granulated sugar, whisked until it holds soft, cloudy peaks.)

Note: Meringues cook best in cooler, dry weather, so if it’s hot and humid, consider a lemon tart instead.

meringue

Follow created for joy on WordPress.com

Enter your email address to follow this blog and receive notifications of new posts by email.

Search

Recent Posts

  • Almond Butter and Jam Cookie Sandwiches
  • Bacon and Egg Breakfast Muffins
  • Loving the Kitchen
  • Creamy Chicken Noodles
  • Double Chip Molasses Oatmeal Cookies

Categories

  • Cook (48)
  • Easy-Peasy (3)
  • Make (37)
  • Read (24)
  • Think (20)

Archives

  • October 2013 (1)
  • March 2013 (1)
  • October 2012 (1)
  • August 2012 (6)
  • July 2012 (4)
  • June 2012 (7)
  • May 2012 (4)
  • April 2012 (6)
  • March 2012 (6)
  • February 2012 (9)
  • January 2012 (14)
  • December 2011 (15)
  • November 2011 (17)
  • October 2011 (6)

All original content © Spring Barnickle, Create Joy LLC, & createdforjoy.com, 2011-2014.

Feel free to link to createdforjoy.com or provide excerpts with clear credit and directions to original content; please ask before copying posts or pictures to your site or publication.

Create a free website or blog at WordPress.com.

Privacy & Cookies: This site uses cookies. By continuing to use this website, you agree to their use.
To find out more, including how to control cookies, see here: Cookie Policy
  • Follow Following
    • created for joy
    • Join 96 other followers
    • Already have a WordPress.com account? Log in now.
    • created for joy
    • Customize
    • Follow Following
    • Sign up
    • Log in
    • Report this content
    • View site in Reader
    • Manage subscriptions
    • Collapse this bar