• Make
  • Cook
  • Read
  • Think
  • My Story

created for joy

~ make today

created for joy

Tag Archives: homemade

Creamy Chicken Noodles

30 Thursday Aug 2012

Posted by createdforjoy in Cook

≈ Leave a comment

Tags

carrots, celery, chicken, chicken noodle soup, chicken stock, comfort, comfort food, cook, creamy, garlic, homemade, noodles, onions, sour cream

Creamy Chicken Noodles

Back-to-school time means lots of wonderful things for my kids: seeing good friends again, resuming favorite activities, and a heap of brand new books and freshly sharpened pencils. But every year without fail, re-entry into the germ soup of childhood also leaves us with a round of late August colds. This time it hit all four of us within a matter of days, so that we left behind a wake of tissue boxes and cough drop wrappers in every room. With a recycling bin full of empty Vitamin Water bottles and all the tiny medicine cups in the house pressed into service, I knew it was time to pull out the big guns: Creamy Chicken Noodles.

This recipe is chicken noodle soup’s saucier, slightly tangy cousin, thanks to a hearty chicken stock and a big spoonful of sour cream. The vegetables are reduced to a mince so that nothing interferes with the creamy, soothing texture. I prepared it with sautéed chicken breasts and broccoli because I was craving protein and something green, but there have been seasons when the savory egg noodles alone nursed us through days at a time. Whether you have a sore throat or not, everyone can do with a little extra TLC this time of year, and a big, steamy bowl of these is just the thing to provide it.

Creamy Chicken Noodles
makes 8-12 servings, depending on your appetite

3 Tbsp. olive or vegetable oil
3 carrots, peeled
4 stalks celery, leaves and white ends removed
1 large or 2 small yellow onions, peeled
4 cloves garlic, peeled
2 tsp. kosher or coarse sea salt
1/2 tsp. ground black pepper
2 tsp. dried basil
1 1/2 tsp. dried thyme
1/2 tsp. crushed brown mustard seed or 1 tsp. dried mustard powder
(if you have neither, substitute 1 Tbsp. prepared grainy mustard)
1/4 tsp. ground dried rosemary (read more in Lamb Ragout recipe notes)
1 32-oz. carton or 4 c. homemade chicken stock (not chicken broth)
2 c. water
12 oz. wide egg noodles
8 oz. sour cream (preferably all-natural, I use Daisy brand)

Cut carrots, celery, and onions into large chunks. Place in food processor along with garlic cloves and process until very finely chopped, stopping just short of puréed. The point is to include all the vegetable flavor and nutrition without the effort of chewing. :) You may need to do this in batches depending on the size of your food processor.

Heat oil over medium-high heat in large stockpot or Dutch oven. Add minced vegetables and cook, stirring occasionally, about 15 minutes, until they are softened and onions and celery are turning translucent. Stir in salt, pepper, basil, thyme, mustard, and rosemary. Add chicken stock and water, cover, and bring to a boil.

When broth is boiling, remove lid and add egg noodles. Simmer rapidly for 12-15 minutes, until noodles are tender and stock has thickened to a saucy consistency. Add sour cream, reduce heat, and simmer on low for another 3-5 minutes, until sour cream is melted and sauce thickened. Taste for final seasoning and add more salt and pepper if needed. Serve piping hot, adding hugs as needed based on recipient’s current emotional state.

Advertisement

Clementine-Scented Vanilla Caramels

05 Monday Dec 2011

Posted by createdforjoy in Cook

≈ Leave a comment

Tags

butter, candy, caramel, clementine, cook, homemade, patience, sulfite-free, vanilla bean paste

caramels1

Things I learned the hard way:
1. Never put on eye make-up while you have the hiccups.
2. If you promise to have six dozen sugar cookies ready in a few weeks, write that down somewhere.
3. You shouldn’t leave a two-year-old alone with a palette of watercolors, even if you think she can’t possibly reach them.
4. Turns out there is such a thing as too much Worcestershire sauce.
5. There are a LOT of ways to mess up homemade caramel.

I learned that last one this weekend after much sugary carnage. I realize now that the key to exquisite caramel is equal parts butter and patience. As you read through the recipe, you might notice I say “stir constantly while simmering for 45 minutes.” That’s not a typo — I really mean three quarters of an hour. My family graciously took stirring shifts, but a half hour in, my husband declared we were never making homemade caramels again. Fast-forward another half hour to his first taste, and that was quickly revised to, “I’m available to stir anytime.” :) These really are just ridiculously, achingly buttery and tender; sweet without being cloying, with a delicate citrus scent from clementine zest steeped in the cream. I foresee many happy hours of stirring ahead.

caramels2

Clementine-Scented Vanilla Caramels
makes 196 dreamy little bites

2 c. granulated sugar
1 c. turbinado or demerara sugar (can substitute packed light brown sugar)
1 c. golden syrup (read more about golden syrup in my Peanut Butter Hot Fudge Sauce Recipe Notes, can substitute light corn syrup)
1 c. evaporated milk
2 c. heavy cream
1 c. unsalted butter (2 sticks) plus more for baking sheet
2 tsp. vanilla bean paste or real vanilla extract (see Recipe Notes)
zest of six clementines (or 2 oranges if clementines unavailable)
1 tsp. coarse kosher or sea salt
10″ x 15″ baking sheet, at least 1″ deep
heavy-duty aluminum foil (regular-strength foil will stick to caramels)
wax paper
candy thermometer

Thoroughly butter a baking sheet lined with heavy-duty aluminum foil. In a large pot, mix evaporated milk, cream, and clementine zest. Cook on low until barely simmering, then remove from heat. Let mixture sit for 10 minutes more, then strain out zest.

Now add both types of sugar, golden syrup, butter, and salt to the cream in the pot. If you’re using vanilla bean paste, add it now; if using vanilla extract, wait to add it until caramel is finished cooking. (See Recipe Notes to find out why.) Attach your candy thermometer to the side of the pot, being sure the probe does not touch the bottom of the pan. Bring to a boil, then simmer the ingredients over medium-low heat, stirring constantly for approximately 45 minutes, until thermometer reads 248F.

When thermometer reaches 248F, immediately remove pot from heat. (If using vanilla extract, now is the time to add it.) Very carefully pour the hot caramel on to the buttered, foil-lined baking sheet. (The care is to protect you, not the caramel.) Let the caramel sit until cooled, about two hours. Now would be a good time to cut out the 190-ish pieces of wax paper you’ll need to wrap your caramels. For this recipe, cut your paper wrappers about 2 1/2″ x 3 1/2″. Your stirring helpers might also be persuaded to assist here.

Flip the cooled caramel slab out on to a piece of parchment or wax paper and gently remove foil. With a sharp, buttered knife, cut into 14 rows and 14 columns, for a total of 196 little rectangles. Wrap each piece in wax paper and twist the ends to seal. This is another lesson in patience brought to you by homemade caramels, but it’s not as bad as it sounds. I got into a good rhythm and wrapped mine in about an hour. (I also wound up with a half dozen less caramels to wrap, thanks to an innovative self-motivation scheme… ;)

These will keep at room temperature for two weeks easily, but they’ll never last that long.

Recipe Notes + Tips:
This is not the first time I’ve mentioned vanilla bean paste, and I am in love with the stuff. It is another ingredient I discovered by necessity after developing food allergies; since traditional flavor extracts are alcohol-based, they are off limits for those with sulfite allergies. Vanilla bean paste is alcohol-free, which means its flavors do not change with cooking and it’s more palatable in uncooked applications like icing. It has the consistency and sweetness of a thick syrup, and it contains real vanilla beans. It can be used teaspoon for teaspoon in place of vanilla extract, but the paste is much more warm and flavorful and gives your food that beautiful vanilla bean-flecked look. (Feast your eyes on the caramel frosting on these cupcakes.) I use Nielsen-Massey vanilla bean paste, and you can check out their web site for where to buy.

Final caramel words of experience: the caramel will triple in size before boiling back down, so trust me when I say to use a large pot. I know 45 minutes seems like a long time, but the rise in temperature needs to be slow to avoid scorching the sugar, so don’t try to cook it over higher heat to speed up the process. You will notice a steady rise in temperature until about 223F; from then on, the water is boiling out, so the process of achieving the next 25 degrees takes longer than the initial 223 did. (That’s science for you.)

Easy Homemade Bread (Really)

19 Saturday Nov 2011

Posted by createdforjoy in Cook, Read

≈ 1 Comment

Tags

artisan, bread, cook, easy, homemade

smsandwich

I have a confession: I have murdered so many sourdough starters that I’ve lost count. This is especially sad because I love everything about baking bread — the scent of yeast, the smooth elasticity of kneaded dough, a slice of warm, buttered bread fresh from the oven… honestly, that’s my idea of romance. There is something so satisfyingly wholesome about turning flour, water, salt, and yeast into nourishment to eat and share.

In the past, my well-intentioned resolve to bake bread from scratch has lasted for whole days at a time before real life intervened. I tried again and again, leaving piles of breadcrumbs and jars of century-old starter in my wake. I burned out an electric stand mixer on a batch of leaden whole wheat. I dabbled in bread machines, but I could never quite accept the notion of “homemade” bread that I hadn’t actually touched until each oddly-shaped loaf emerged from its little metal case. Then in 2008, I fractured two vertebrae and a rib while kneading bread dough (my first hint that I had osteoporosis). I don’t give up easily, but even I was a wee bit discouraged after that.

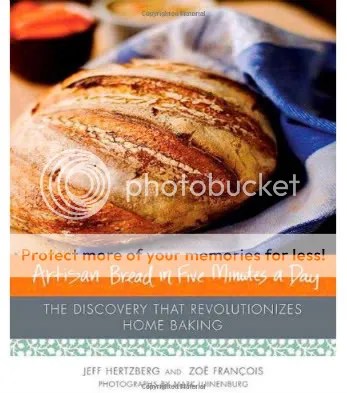
So when a dear foodie friend of mine recommended a book entitled Artisan Bread in Five Minutes a Day, I was skeptical. I’ve made recipes that required more time than that just to proof the yeast, and don’t even get me started on kneading, resting, and rising. But I borrowed his copy, and as I read it, I started to believe it was actually possible. Then I set a timer and made the first batch of dough: four loaves’ worth was rising on the counter before my five minutes were up. When the first loaf came out of the oven looking like something from a bakery in Provence, I was impressed; then my family polished it off in about the same amount of time it took to make it. Only contented sighs and a few smears of butter on the counter proved it ever existed, and I was happily converted to the ranks of Bakers of Bread.

Artisan Bread in Five Minutes a Day was written by a chemist and a pastry chef, and through an extensive research process, they whittled down making bread to its essential steps. There is no proofing, no kneading, and no second rising phase. A recipe makes enough for four 1-lb. loaves, so you can enjoy fresh bread every day, and it’s easy enough to make that both my kids (ages 11 and 14) can do it. The basic recipe for white bread is so tasty, it took me a long while to venture into other combinations, but everything I’ve tried in the cookbook is delicious. My most recent batch was Roasted Garlic Potato Bread, which I used to make open-face meatloaf sandwiches (a play on the traditional side of mashed potatoes) and Turkey BLT’s (pictured above). If you’re a would-be baker or have one in the family, this book is worth every penny. I’d love to hear how it goes if you try it out. :)

Photobucket

Follow created for joy on WordPress.com

Enter your email address to follow this blog and receive notifications of new posts by email.

Search

Recent Posts

  • Almond Butter and Jam Cookie Sandwiches
  • Bacon and Egg Breakfast Muffins
  • Loving the Kitchen
  • Creamy Chicken Noodles
  • Double Chip Molasses Oatmeal Cookies

Categories

  • Cook (48)
  • Easy-Peasy (3)
  • Make (37)
  • Read (24)
  • Think (20)

Archives

  • October 2013 (1)
  • March 2013 (1)
  • October 2012 (1)
  • August 2012 (6)
  • July 2012 (4)
  • June 2012 (7)
  • May 2012 (4)
  • April 2012 (6)
  • March 2012 (6)
  • February 2012 (9)
  • January 2012 (14)
  • December 2011 (15)
  • November 2011 (17)
  • October 2011 (6)

All original content © Spring Barnickle, Create Joy LLC, & createdforjoy.com, 2011-2014.

Feel free to link to createdforjoy.com or provide excerpts with clear credit and directions to original content; please ask before copying posts or pictures to your site or publication.

Create a free website or blog at WordPress.com.

Privacy & Cookies: This site uses cookies. By continuing to use this website, you agree to their use.
To find out more, including how to control cookies, see here: Cookie Policy
  • Follow Following
    • created for joy
    • Join 96 other followers
    • Already have a WordPress.com account? Log in now.
    • created for joy
    • Customize
    • Follow Following
    • Sign up
    • Log in
    • Report this content
    • View site in Reader
    • Manage subscriptions
    • Collapse this bar