• Make
  • Cook
  • Read
  • Think
  • My Story

created for joy

~ make today

created for joy

Tag Archives: easy

Raspberry Dutch Baby

13 Monday Aug 2012

Posted by createdforjoy in Cook

≈ 1 Comment

Tags

all-natural, apples, blueberries, blueberry, breakfast, brunch, cook, creme fraiche, dutch baby, easy, egg, morning, pancake, pears, popover, raspberries, raspberry, recipe

dutchbaby

Monday morning of our second week of school dawned stormy and gray, not the best encouragement to get out of bed for little bodies still on their sleepy summertime schedule. This Raspberry Dutch Baby was the perfect way to brighten up the start of our day. A dutch baby is a cross between a pancake and a popover, eggy and fruity, with a hint of sweetness and cinnamon. It comes together in five minutes, but between the golden brown dome and a sprinkling of powdered sugar, it makes morning feel like a special occasion.

In the summer, you can easily substitute blueberries or peach slices for the raspberries, and it tastes lovely with apples or pears in the fall. For another yummy variation, try substituting ground nutmeg and ginger for the cinnamon. We like ours with a dollop of creme fraiche on top, but vanilla yogurt or whipped cream work as well. Guaranteed morning sunshine, regardless of the weather. :)

dutchbaby

Raspberry Dutch Baby
serves 6-8

1 c. raspberries, rinsed
2 Tbsp. unsalted butter
3 Tbsp. granulated sugar, divided
3 large eggs
1/2 c. milk
1/2 c. all-purpose flour
1/2 tsp. cinnamon
1/2 tsp. vanilla bean paste or real vanilla extract
dash of salt
a few teaspoons powdered sugar to sift over the top
a few teaspoons creme fraiche or vanilla yogurt to serve

Oven 450F. Cut the butter into two pieces and place in small glass or ceramic baking dish. (I use either a 9″x6″ oval or a 9″-round dish.) Place the dish in the preheated oven for the butter to melt while you finish the remaining steps, about five minutes.

In a small bowl, mix the raspberries with two tablespoons of the sugar, breaking up a few of the berries so they better release their juices, and set aside. In a blender, mix remaining tablespoon of sugar, eggs, milk, flour, cinnamon, vanilla, and salt. Blend on medium speed for one minute, until thoroughly mixed and a bit frothy.

Carefully remove the hot baking dish from the oven and pour in the batter. Scatter the berries and their juice over the top, then place in oven and bake 17-18 minutes, until edges are puffed and golden brown and center is completely set. (My oven cooks a bit hotter toward the front, so I rotate the dish halfway through.)

Sift powdered sugar over the top and serve immediately with a dollop of creme fraiche or yogurt on top. This does not save well, so be generous. :)

Recipe Notes:
If you would like to use a cup of thinly sliced apples or pears instead of berries, then the directions change slightly. While the butter is melting in the baking dish in the oven, toss the fruit with two tablespoons sugar, an extra 1/4 tsp. of ground cinnamon, and a grating of fresh nutmeg. Arrange the fruit slices evenly in the melted butter and bake for 10-12 minutes, until softened. Prepare the batter as directed above, then pour over the cooked sliced fruit. Bake 17-18 minutes more, then serve as described for the berry version.

dutchbaby

Advertisement

Easy-Peasy Friday: Slow-Roasted Tomatoes

10 Friday Aug 2012

Posted by createdforjoy in Cook, Easy-Peasy

≈ 5 Comments

Tags

cook, easy, easy-peasy, farmer's market, heirloom, quick, recipe, roasted, simple, slow-roasted, summer, tomatoes

tomatoes

With the plethora of tiny tomatoes available at the market right now, it’s the perfect time for a batch of these slow-roasted beauties. I found a rainbow of locally grown, organic baby heirlooms at a fantastic price, but traditional cherry or grape tomatoes work just as well. The key to this recipe is the low, slow cooking, which coaxes every bit of sweetness and flavor out of the fruit.

What makes this recipe easy-peasy is that the tomatoes are placed in a preheated oven which is then promptly turned off, so that they are left to roast slowly overnight as the heat of the oven dissipates. This fix-it-and-forget-it roasting method is the brainchild of Nigella Lawson, one of my favorite cookbook authors, who devoted an entire cookbook to easy-peasy recipes: Nigella Express: 130 Recipe for Good Food, Fast.

The question is not what you can do with a pint of these, but really what you can’t. They lend instant credibility to any green salad and make a lovely partner for pasta. Add a handful of freshly chopped basil, and they become a quick bruschetta topping. I love them on pizza with no more than goat cheese and a glug of olive oil. They’re also delicious stirred into tuna or chicken salad for a Mediterranean feel. I’d love to hear how you use yours. :)

tomatoes

Easy-Peasy Slow-Roasted Tomatoes
makes one pint

1) Preheat your oven to 475F while you wash and halve one pint of tomatoes.

2) Place the tomatoes in a ceramic or glass oven-safe dish and toss with 1/4 cup extra virgin olive oil; 1/2 teaspoon each coarse salt, pepper, and granulated sugar; 1/4 teaspoon garlic powder; and 1 teaspoon dried thyme.

3) Place the tomatoes in the preheated oven and turn off the heat. Leave for at least six hours, preferably overnight. Finished tomatoes can be stored in the refrigerator in a glass jar for up to two weeks. (Don’t forget to spoon the seasoned oil and cooking juices into the jar with them — yum!)

A last note: more than once, I have forgotten I put a batch of these in the oven the night before. Usually I make the discovery when I preheat the oven for another recipe and find the lovely scent of caramelizing tomatoes in the air. However, I once rediscovered them after preheating the oven to broil. The tomatoes were charcoal, my roasting dish was never the same, and now I put a post-it note on the oven to remind me I have them in there. (I am sure none of you would ever be so forgetful, but I thought I’d share anyway. ;)

olive oil

Chocolate Chip Meringues

26 Tuesday Jun 2012

Posted by createdforjoy in Cook

≈ 5 Comments

Tags

bake, chocolate chip, cook, cookies, easy, gluten-free, meringue, recipe, sweet, vanilla

meringues02

It’s a happy thing when practicality and yumminess overlap in the kitchen. That’s the case with this recipe, born of the need to make a gluten-free dessert for dear friends, and helped along by the glut of egg whites in my freezer as a result of making pastry cream the week before. These homemade meringues are sweet, chewy little clouds, flavored with vanilla bean and mini-chocolate chips. They are simple, low-fat, and delicious, and that’s always a winning combo in my book.

I shaped mine with the help of an ice-cream scoop because I love the look of rows of brilliant white puffs, dotted with chocolate chips and sprinkles. However, if you’re feeling fancy, these can also be piped out of a large decorating tip into star shapes or little peaked mounds. They go beautifully with the tartness of summer berries, or served alongside coffee. They’re so easy to make, they almost qualify as an Easy-Peasy Friday recipe, and they are certainly a wonderful friend to have along for the weekend.

meringues03

Chocolate Chip Meringues
makes twenty-four 2″-wide meringues

4 large egg whites
1/2 tsp. cream of tartar
1/4 tsp. salt
1 c. granulated sugar
2 tsp. vanilla bean paste or real vanilla extract
2 c. semisweet mini-chocolate chips
chocolate sprinkles (optional)

Oven 200F. In a large mixing bowl, combine the egg whites, cream of tartar, and salt. Beat until soft peaks begin to form, then gradually add the sugar. Beat several minutes more, until mixture is thick and glossy, adding the vanilla at the end. Stir in the mini-chocolate chips with a silicone spatula.

Using a an ice cream/cookie dough scoop that holds 2-1/2 tablespoons, scoop out mounds of meringue about two inches apart on to parchment-lined baking sheet. Add sprinkles to the tops as desired. Bake for two hours at 200F, until outside of cookies is firm and centers are chewy marshmallow-like consistency. Alternately, pipe meringues into 1-1/2″-wide stars or mounds and bake at 200F for 1-1/2 hours.

Cool completely on baking sheets, then transfer to airtight container and store at room temperature.

meringues01

Easy-Peasy Friday: Frozen Choco-Bananas

01 Friday Jun 2012

Posted by createdforjoy in Cook, Easy-Peasy

≈ Leave a comment

Tags

almonds, bananas, choco-bananas, chocolate, coconut, cook, easy, easy-peasy, frozen, quick, sprinkles, treat

chocobananas01

We have a one-word exclamation in our house that brings a smile to everyone’s face: WEEKEND! (If there was a font face to communicate squealing with anticipation, I’d be using it right now.) And while I sometimes use Saturday mornings to tackle more complex, time-intensive cooking and artwork, what I really want most is to spend those precious weekend moments with the people I care about. I want our time together to be fun and special, and I love to make little treats and crafts that show my friends and family they are cherished.

With that in mind, I’m introducing Easy-Peasy Fridays on createdforjoy.com! I thought it might be nice to ease us into the weekend with a quick, simple recipe or craft idea. I’ve decided any project or recipe is game, as long as it 1) requires no more than three steps, 2) can be completed while children and guests are underfoot, and 3) makes the weekend feel special. Stay tuned for all sorts of easy-peasy fun. :)

chocobananas02

The inaugural Easy-Peasy Friday recipe was a pretty obvious choice because it’s a summer staple at our house and one of our favorite easy treats: Frozen Choco-Bananas. It’s the perfect use for week-old bananas that would make for a sad lunchtime companion, but aren’t quite ready for banana bread. These are great because they’re simple to make, popular with all ages, and more nutritionally complete than a popsicle or scoop of ice cream.

To make your own Frozen Choco-Bananas:

1) Peel the bananas and chop either into halves or fourths, and insert either a toothpick or popsicle stick in the base of each piece.
2) Place on a wax paper-lined plate and freeze for a few hours.
3) Swirl the frozen bananas in melted chocolate (I usually just microwave a cup of semi-sweet chocolate chips until melted, but fancier chocolate is fine), then roll in the topping of your choice: chopped nuts, sprinkles, toasted coconut, mini marshmallows, dried fruit, or crushed candy bars. Freeze again until chocolate is firm, then serve or store in a zip-top plastic bag.

These last for weeks if well-wrapped… or at least, I think they would. We always eat them all in a matter of days. Perfect kid fare for birthdays or slumber parties, a yummy way to keep cool at BBQ’s and picnics, and a great surprise to pull from the cooler after a summer hike.

Oh, one more thing: WEEKEND! :)

chocobananas05

Easy Homemade Bread (Really)

19 Saturday Nov 2011

Posted by createdforjoy in Cook, Read

≈ 1 Comment

Tags

artisan, bread, cook, easy, homemade

smsandwich

I have a confession: I have murdered so many sourdough starters that I’ve lost count. This is especially sad because I love everything about baking bread — the scent of yeast, the smooth elasticity of kneaded dough, a slice of warm, buttered bread fresh from the oven… honestly, that’s my idea of romance. There is something so satisfyingly wholesome about turning flour, water, salt, and yeast into nourishment to eat and share.

In the past, my well-intentioned resolve to bake bread from scratch has lasted for whole days at a time before real life intervened. I tried again and again, leaving piles of breadcrumbs and jars of century-old starter in my wake. I burned out an electric stand mixer on a batch of leaden whole wheat. I dabbled in bread machines, but I could never quite accept the notion of “homemade” bread that I hadn’t actually touched until each oddly-shaped loaf emerged from its little metal case. Then in 2008, I fractured two vertebrae and a rib while kneading bread dough (my first hint that I had osteoporosis). I don’t give up easily, but even I was a wee bit discouraged after that.

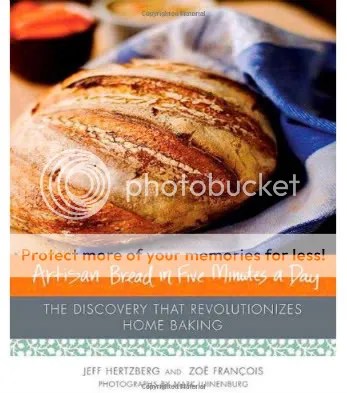
So when a dear foodie friend of mine recommended a book entitled Artisan Bread in Five Minutes a Day, I was skeptical. I’ve made recipes that required more time than that just to proof the yeast, and don’t even get me started on kneading, resting, and rising. But I borrowed his copy, and as I read it, I started to believe it was actually possible. Then I set a timer and made the first batch of dough: four loaves’ worth was rising on the counter before my five minutes were up. When the first loaf came out of the oven looking like something from a bakery in Provence, I was impressed; then my family polished it off in about the same amount of time it took to make it. Only contented sighs and a few smears of butter on the counter proved it ever existed, and I was happily converted to the ranks of Bakers of Bread.

Artisan Bread in Five Minutes a Day was written by a chemist and a pastry chef, and through an extensive research process, they whittled down making bread to its essential steps. There is no proofing, no kneading, and no second rising phase. A recipe makes enough for four 1-lb. loaves, so you can enjoy fresh bread every day, and it’s easy enough to make that both my kids (ages 11 and 14) can do it. The basic recipe for white bread is so tasty, it took me a long while to venture into other combinations, but everything I’ve tried in the cookbook is delicious. My most recent batch was Roasted Garlic Potato Bread, which I used to make open-face meatloaf sandwiches (a play on the traditional side of mashed potatoes) and Turkey BLT’s (pictured above). If you’re a would-be baker or have one in the family, this book is worth every penny. I’d love to hear how it goes if you try it out. :)

Photobucket

Follow created for joy on WordPress.com

Enter your email address to follow this blog and receive notifications of new posts by email.

Search

Recent Posts

  • Almond Butter and Jam Cookie Sandwiches
  • Bacon and Egg Breakfast Muffins
  • Loving the Kitchen
  • Creamy Chicken Noodles
  • Double Chip Molasses Oatmeal Cookies

Categories

  • Cook (48)
  • Easy-Peasy (3)
  • Make (37)
  • Read (24)
  • Think (20)

Archives

  • October 2013 (1)
  • March 2013 (1)
  • October 2012 (1)
  • August 2012 (6)
  • July 2012 (4)
  • June 2012 (7)
  • May 2012 (4)
  • April 2012 (6)
  • March 2012 (6)
  • February 2012 (9)
  • January 2012 (14)
  • December 2011 (15)
  • November 2011 (17)
  • October 2011 (6)

All original content © Spring Barnickle, Create Joy LLC, & createdforjoy.com, 2011-2014.

Feel free to link to createdforjoy.com or provide excerpts with clear credit and directions to original content; please ask before copying posts or pictures to your site or publication.

Blog at WordPress.com.

Privacy & Cookies: This site uses cookies. By continuing to use this website, you agree to their use.
To find out more, including how to control cookies, see here: Cookie Policy
  • Follow Following
    • created for joy
    • Join 96 other followers
    • Already have a WordPress.com account? Log in now.
    • created for joy
    • Customize
    • Follow Following
    • Sign up
    • Log in
    • Report this content
    • View site in Reader
    • Manage subscriptions
    • Collapse this bar